Wet Winter.

This Winter has seemed long and dark and wet. Even I have begun to hibernate.

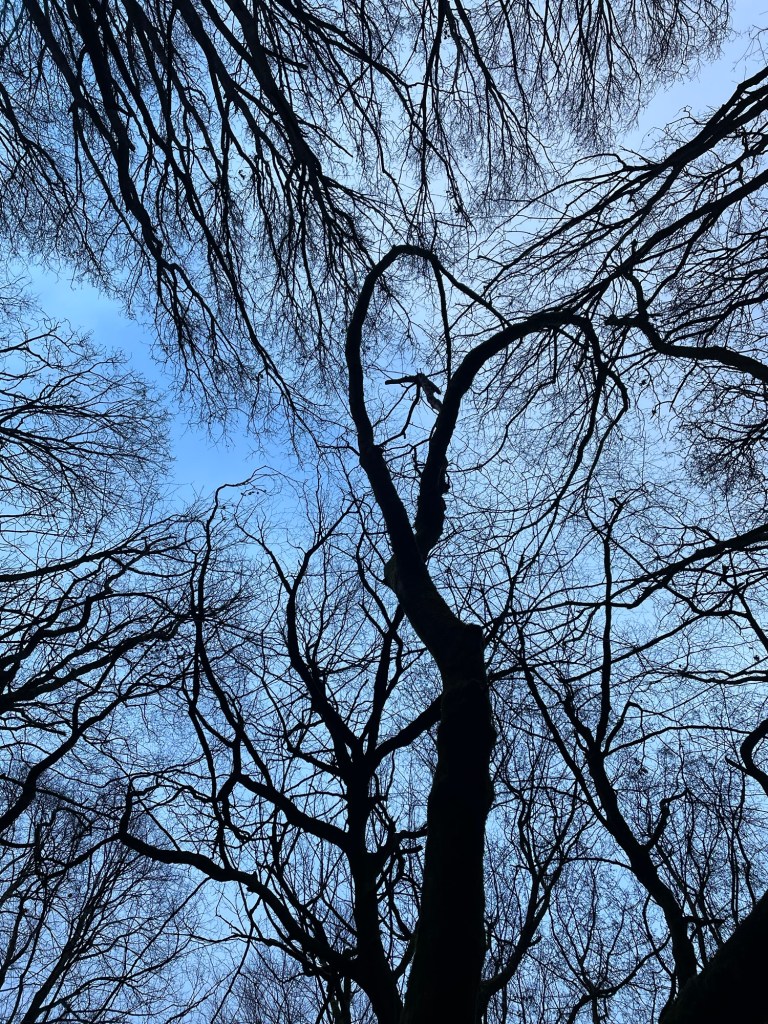
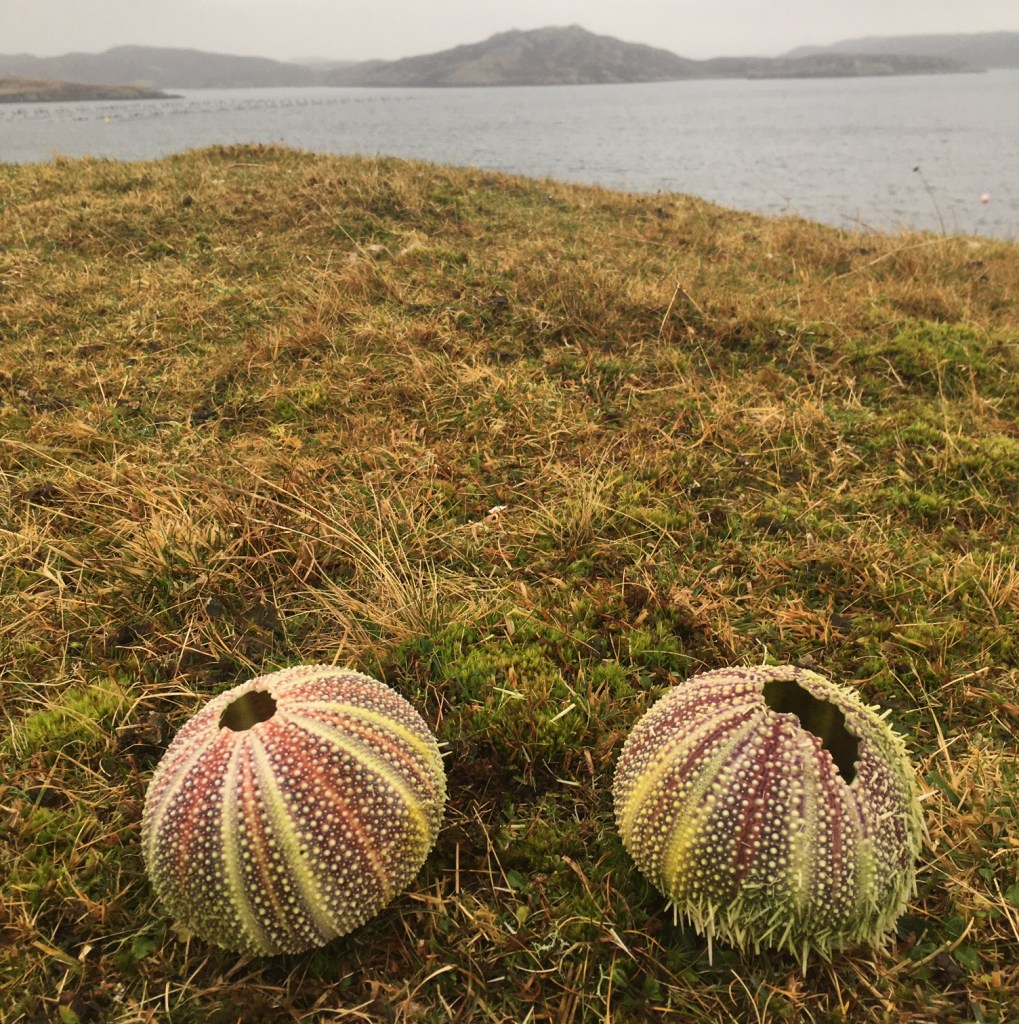
Last week, we had one small window of a couple of hours of light and I walked through the woods looking at the sky between the bare branches up high.

Behind the scenes, I am devising a 6 month programme for a Colour Swatch Club – some of you have sent me registration forms for this – I am looking forward to sending you all the information and monthly list soon as well as starting the club in April.

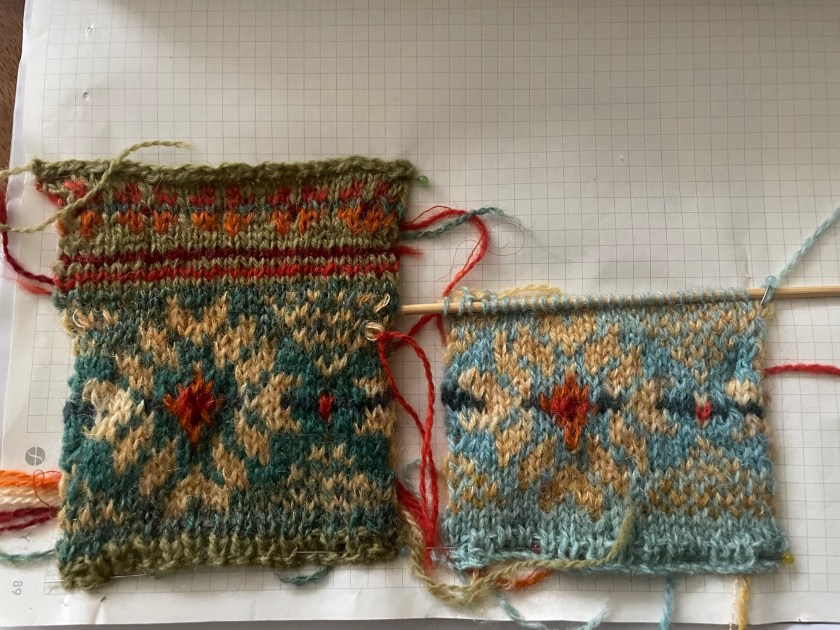
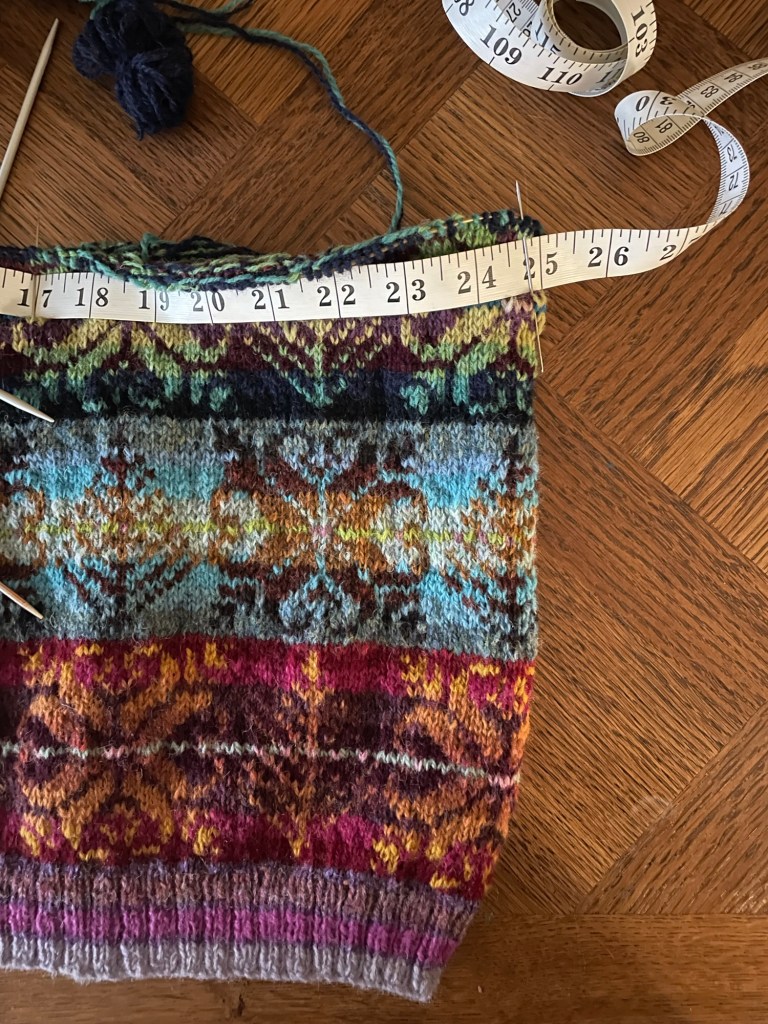
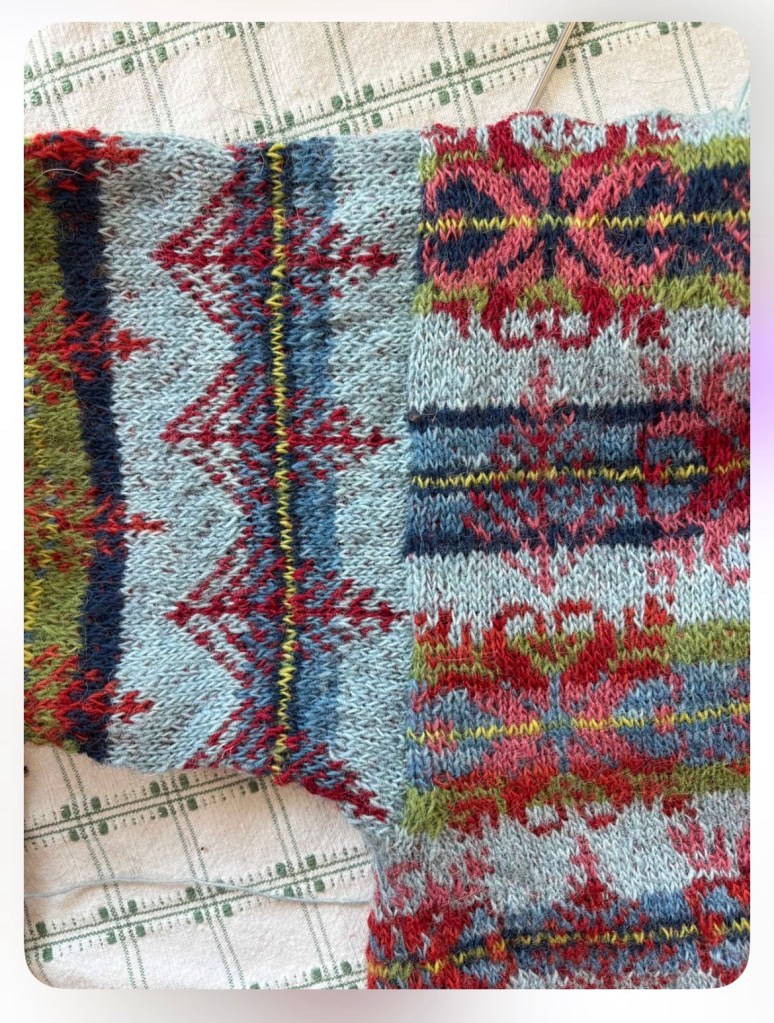
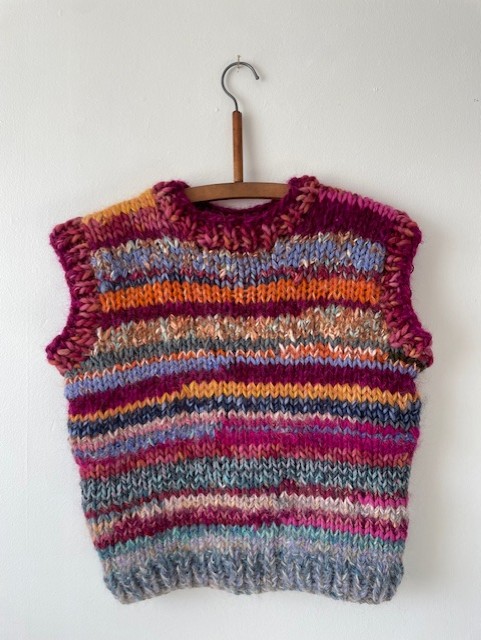
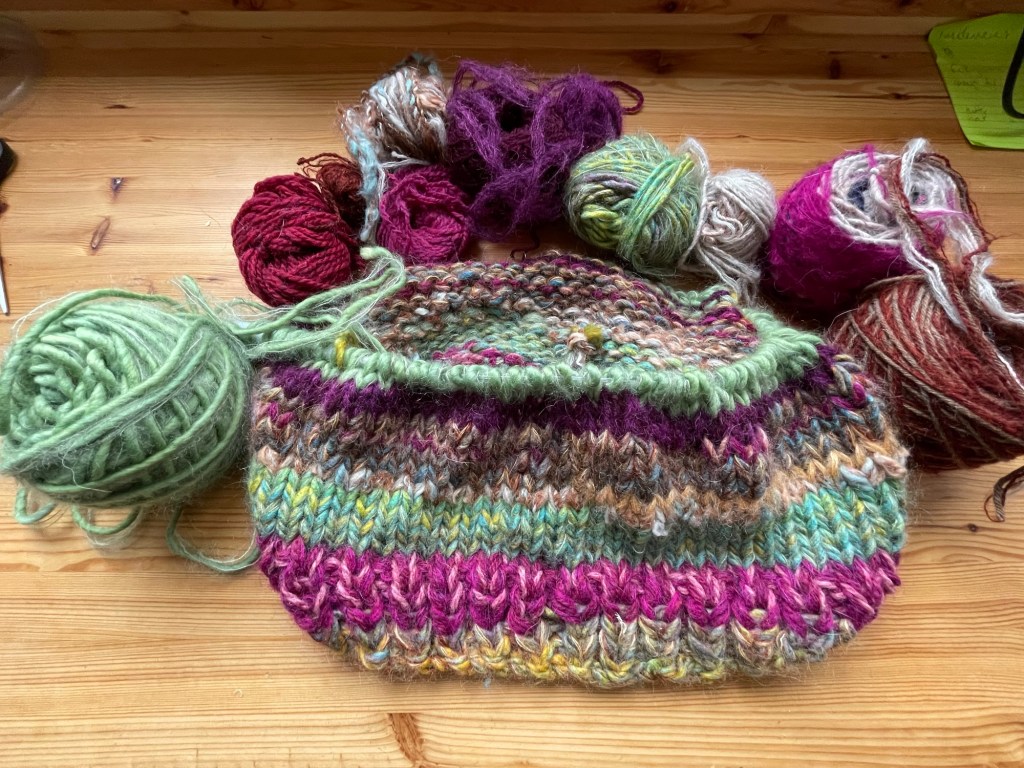
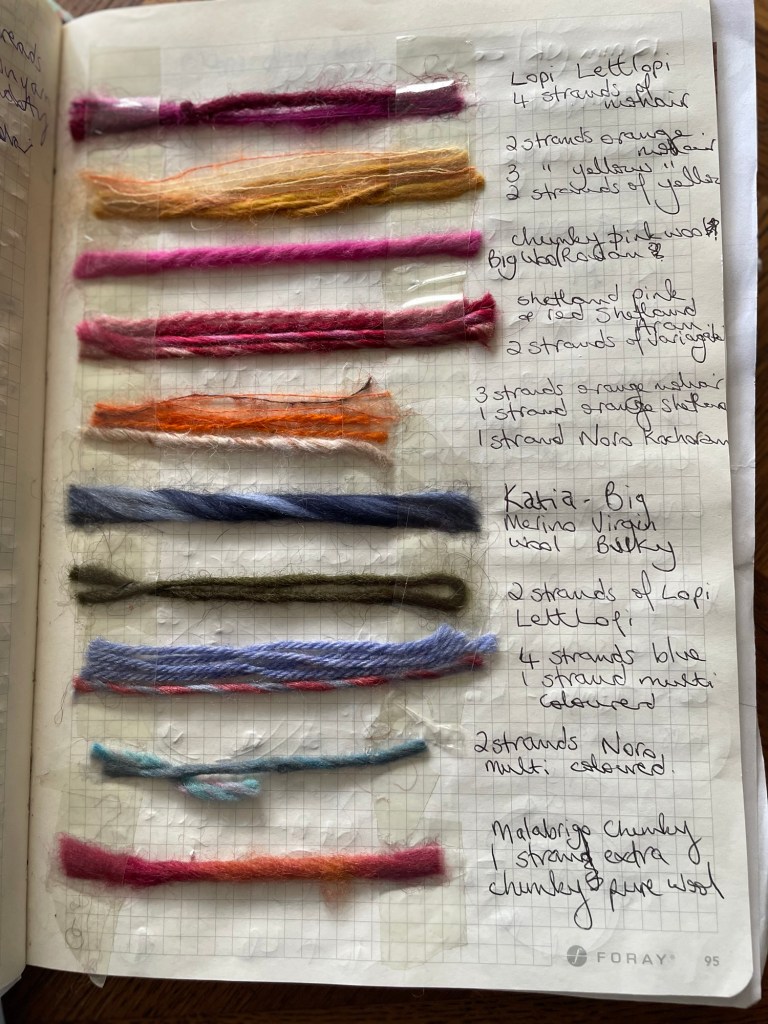
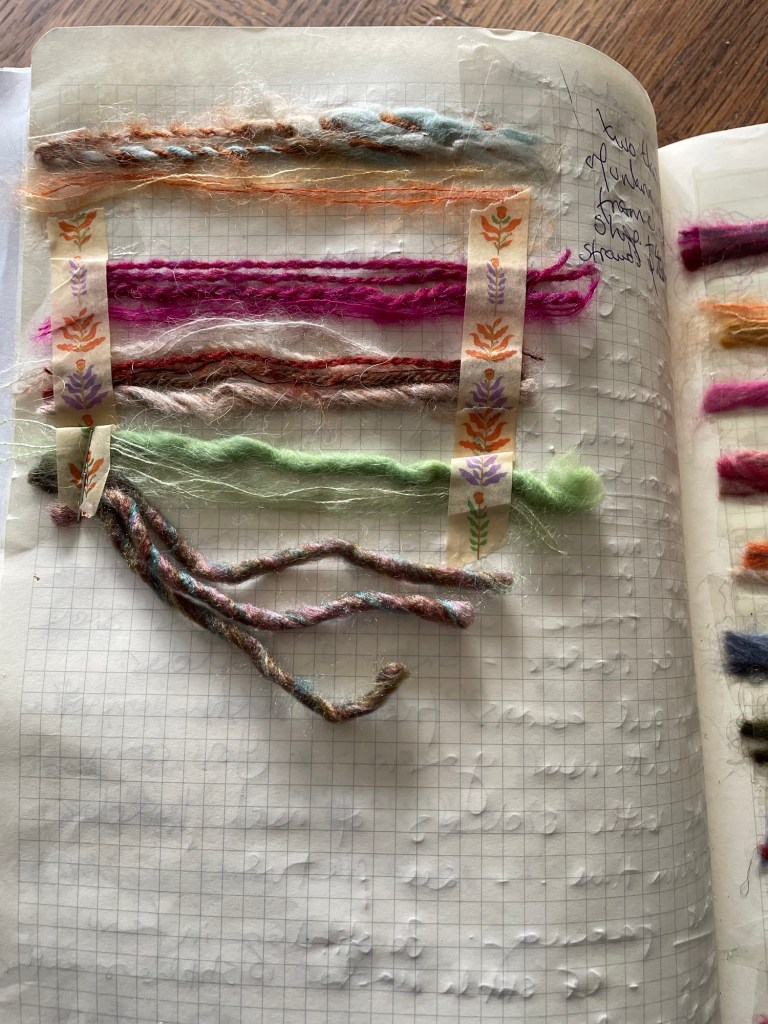
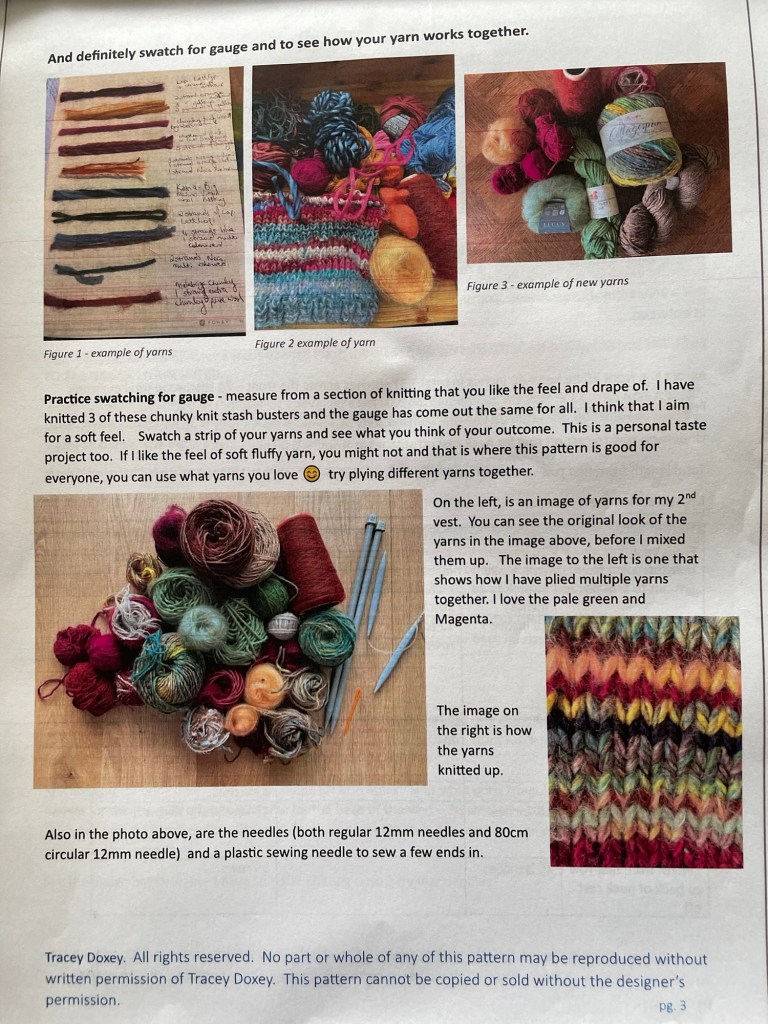
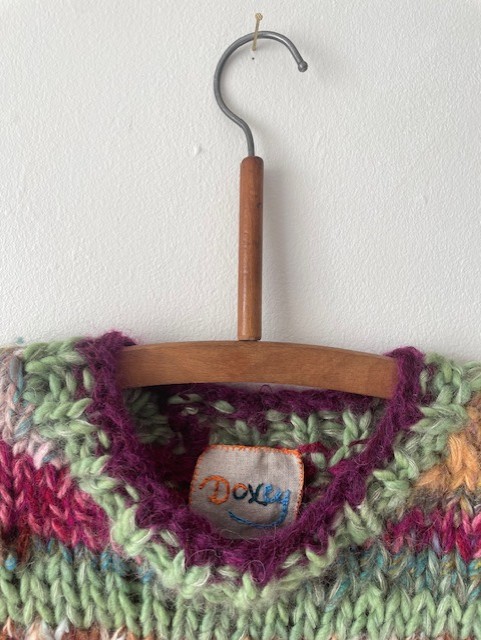
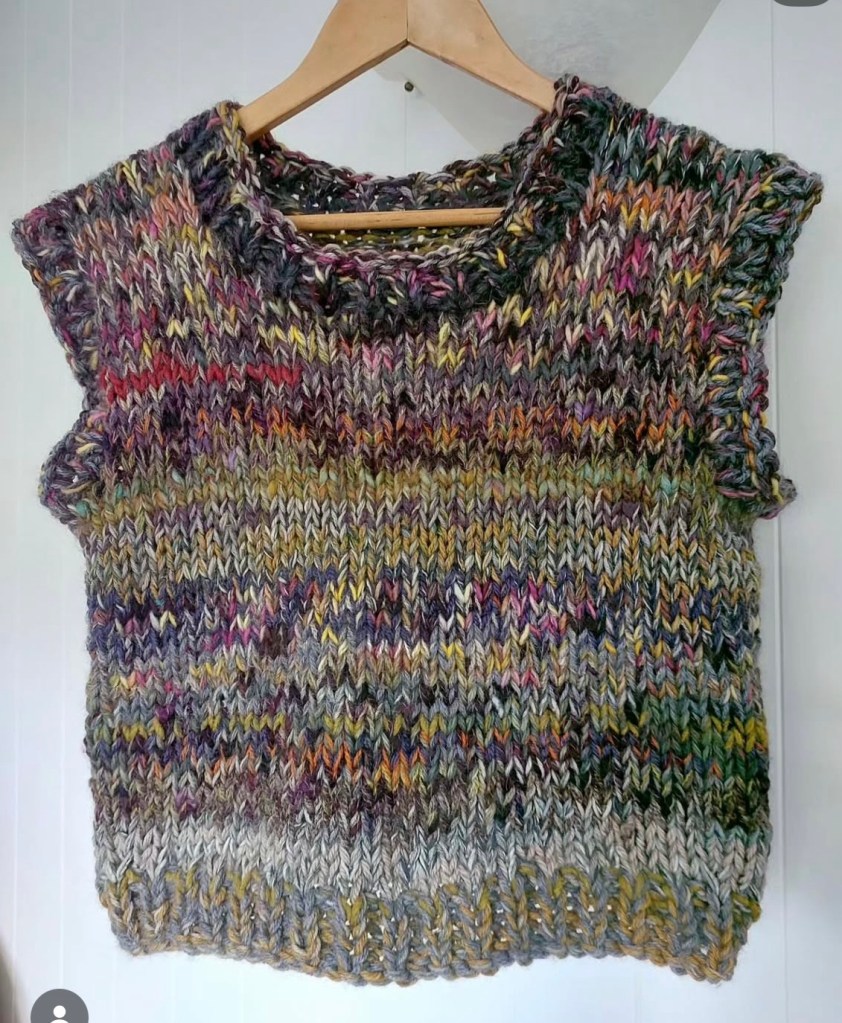
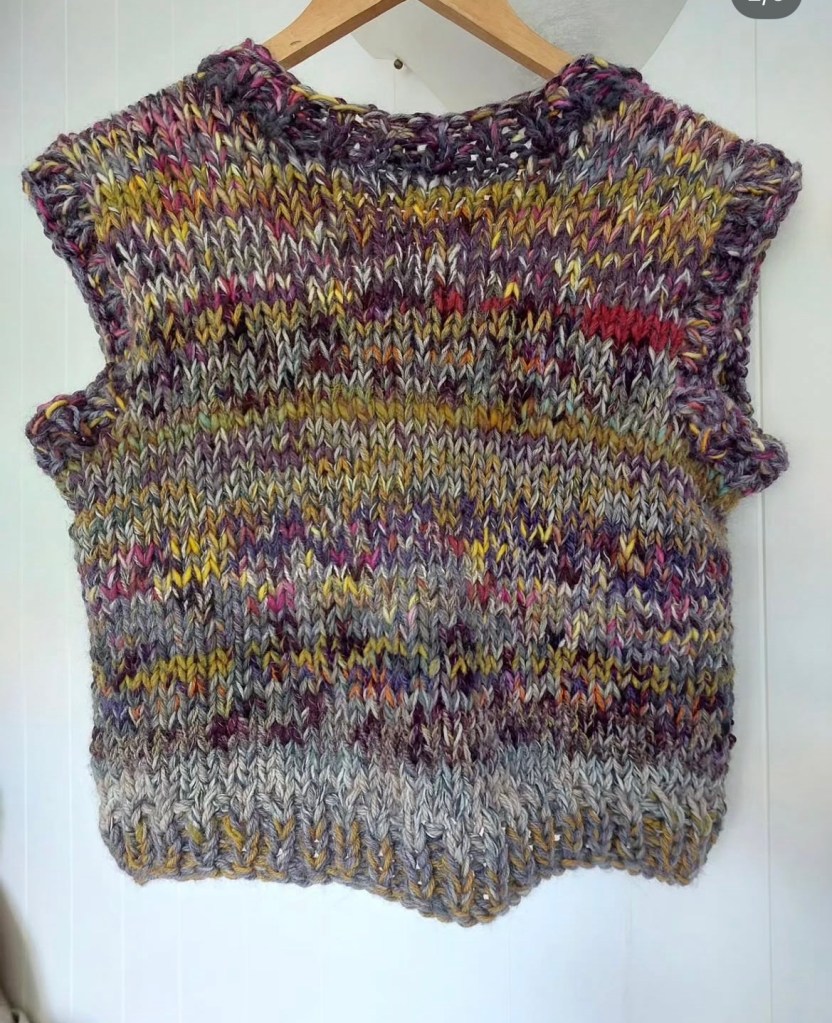
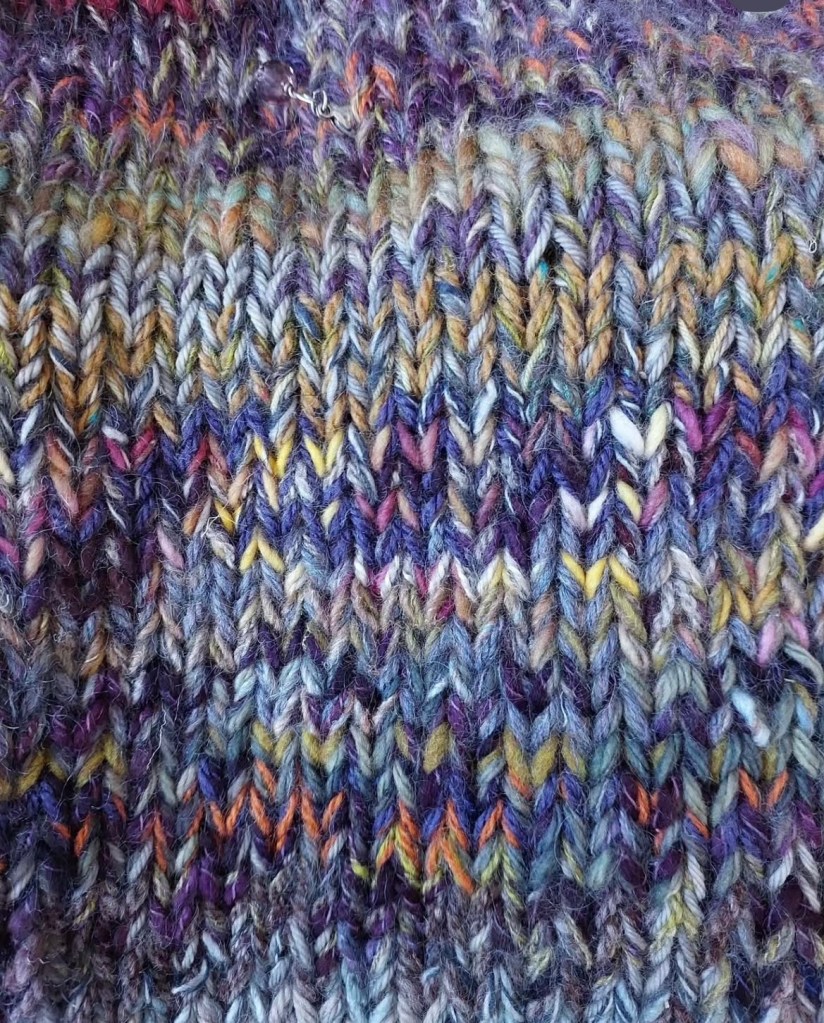
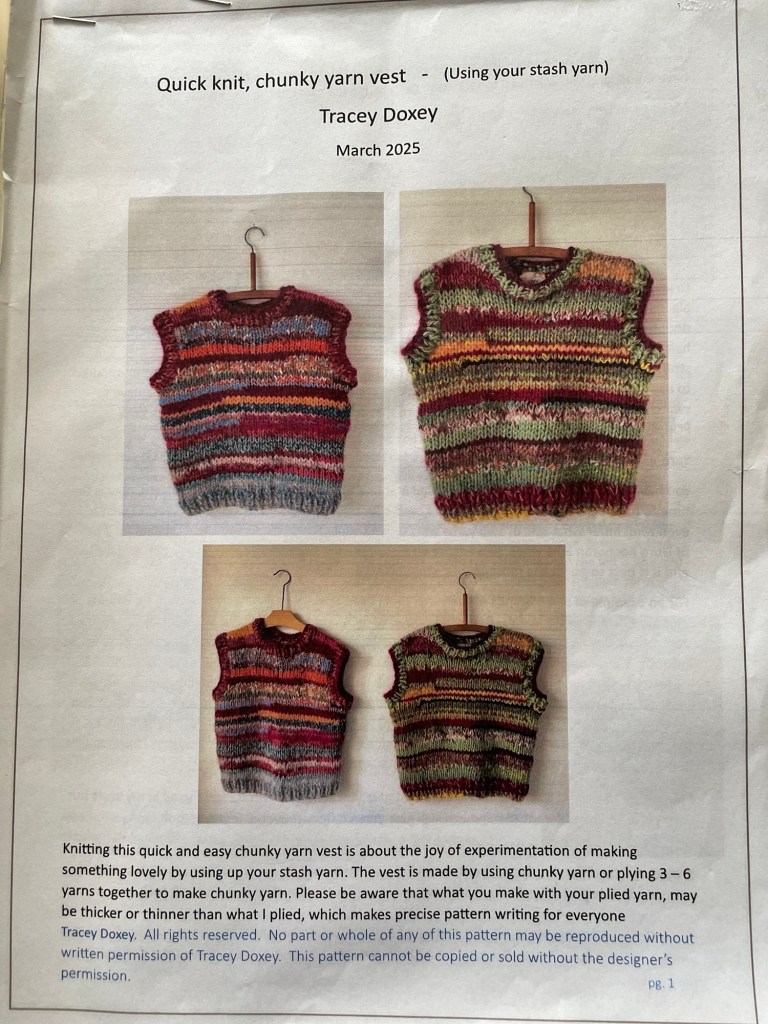
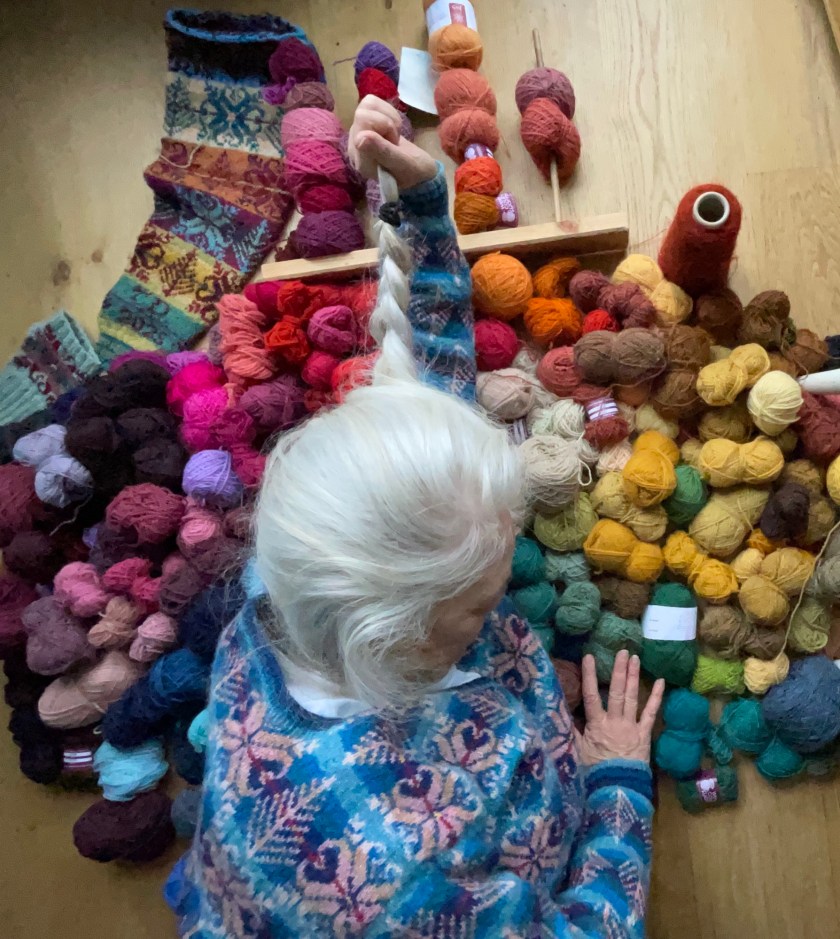
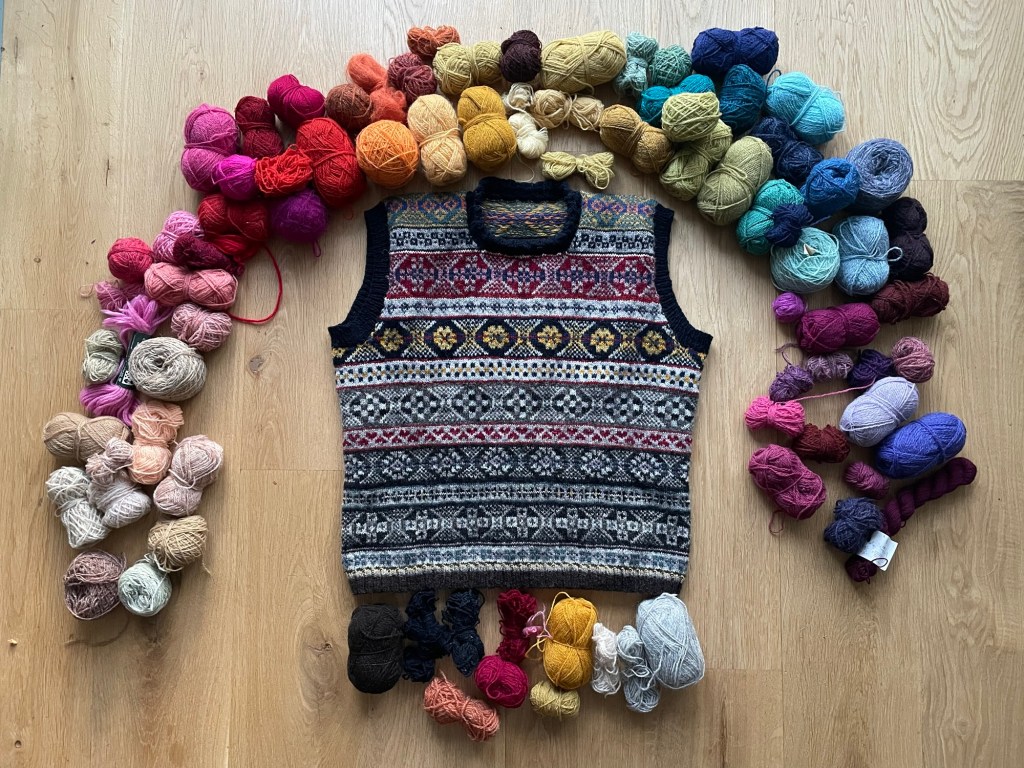
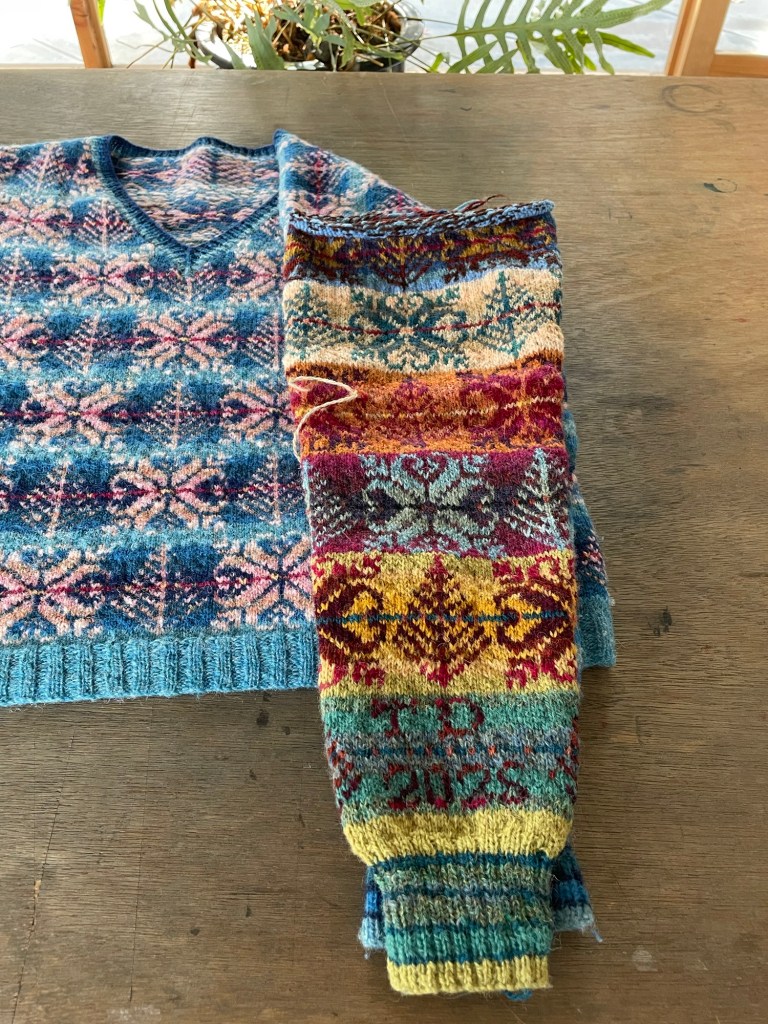
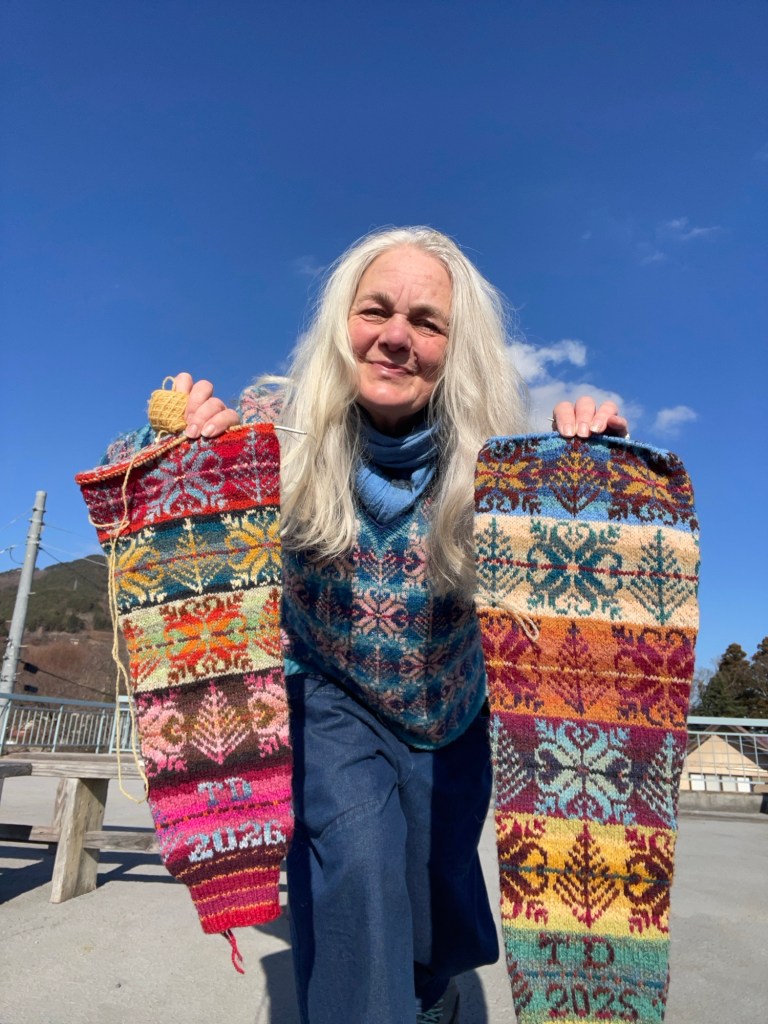
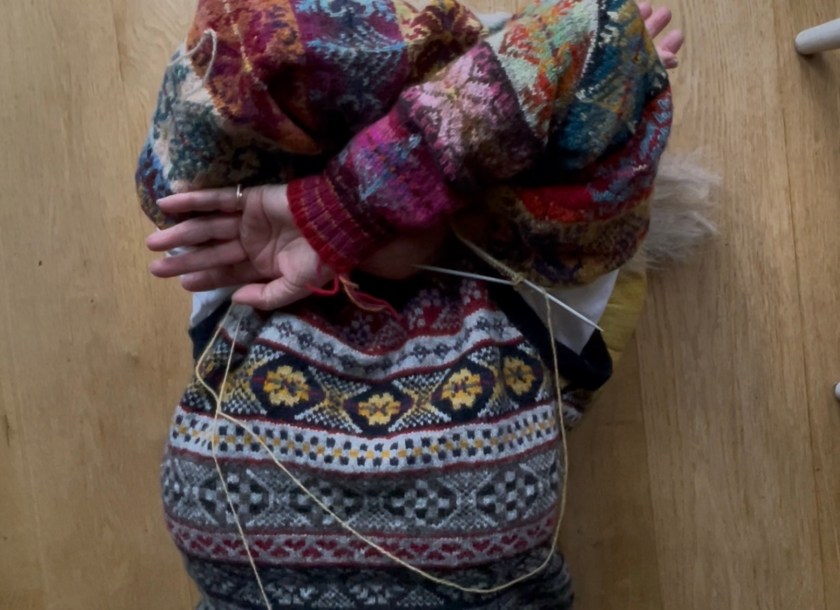
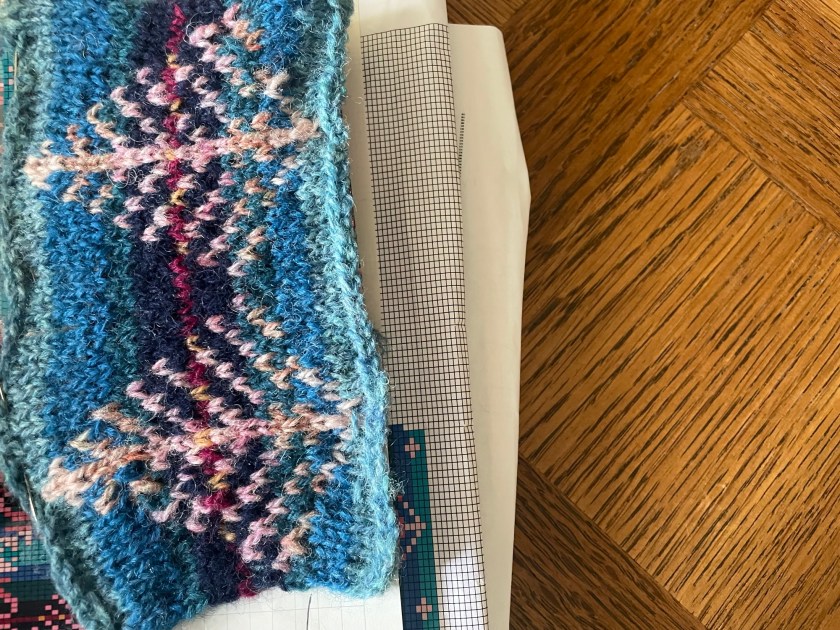
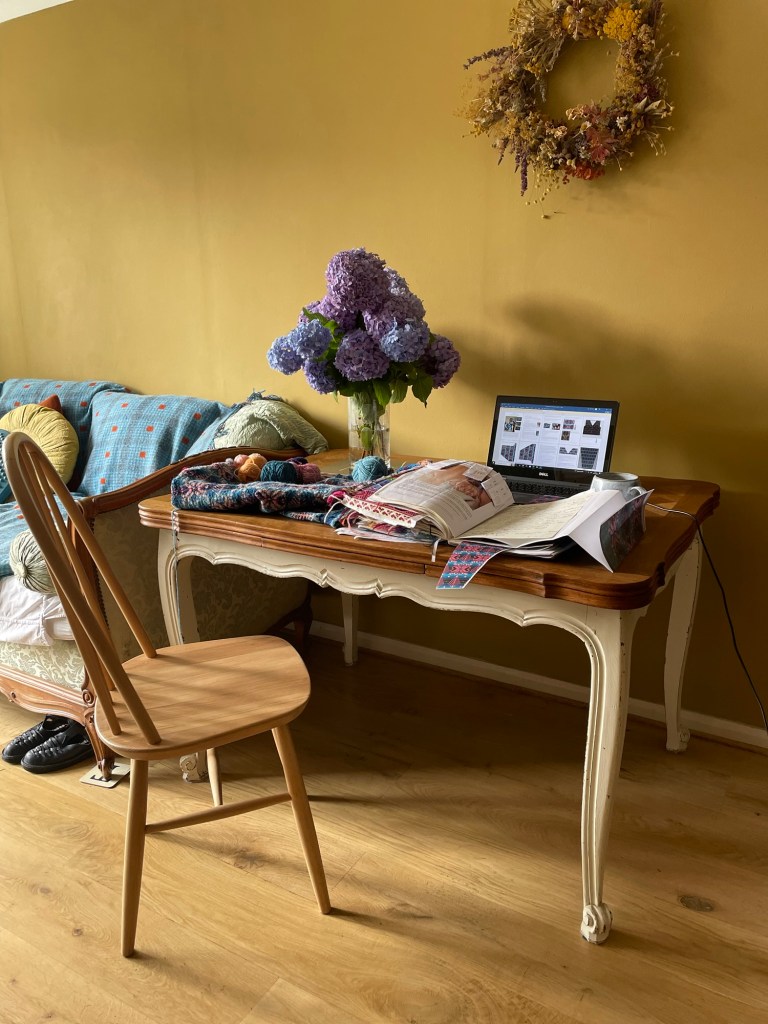
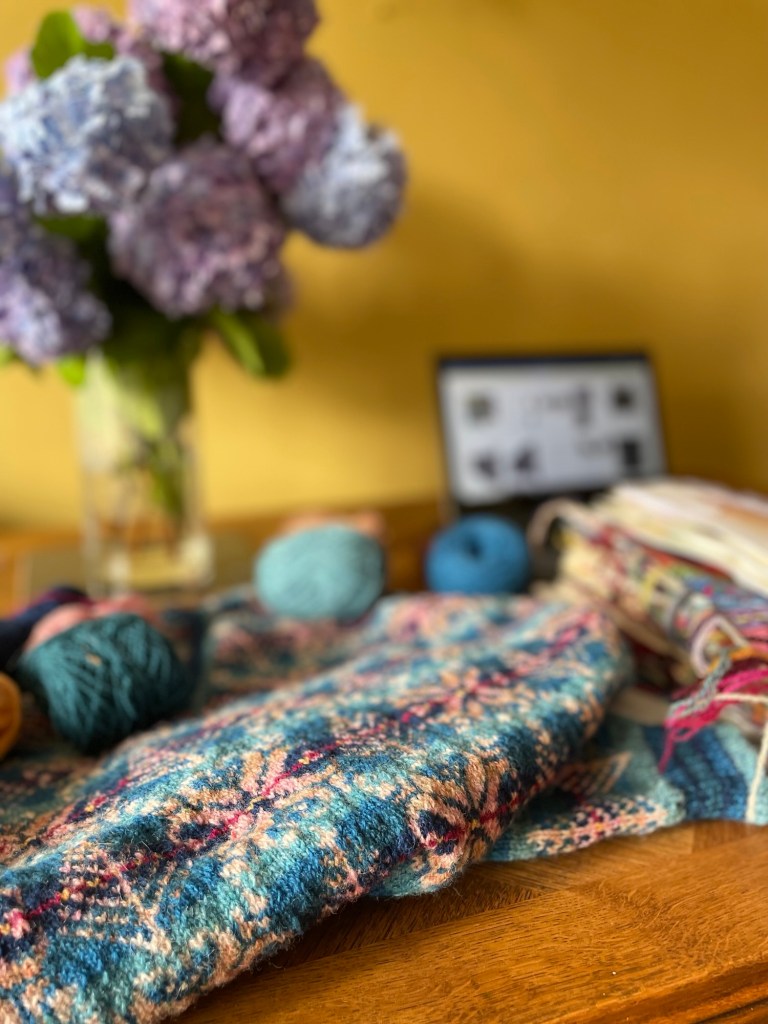
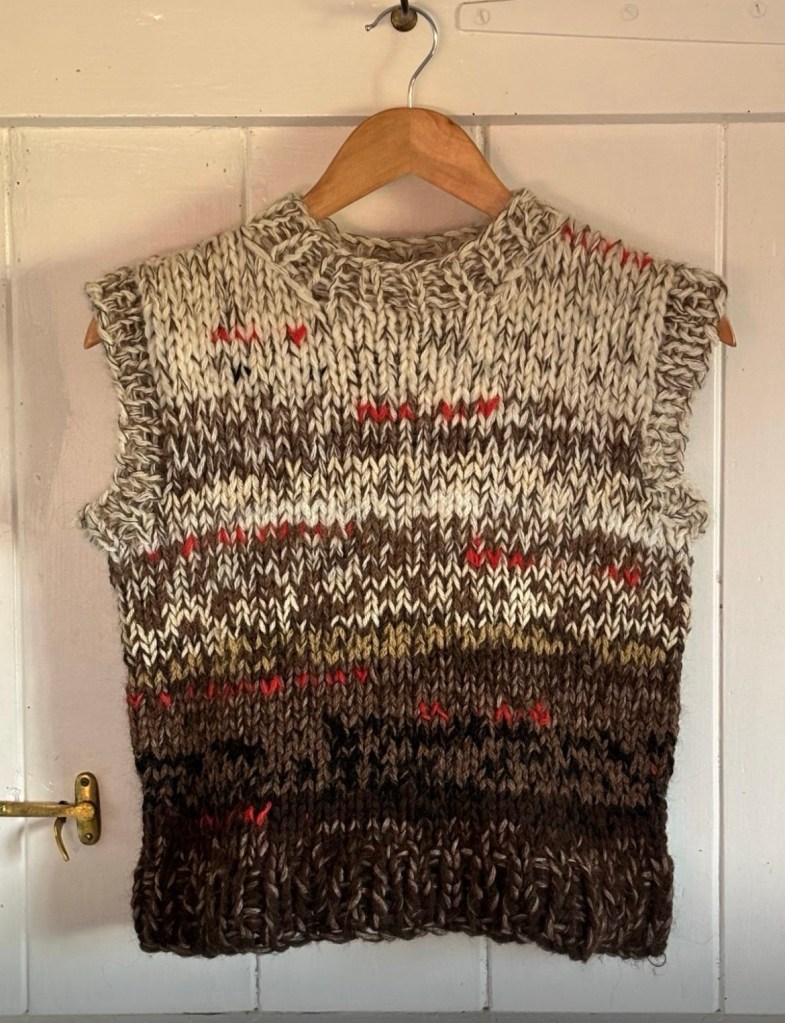
I have also been knitting my 2nd Kaleidoscope Jumper using any leftover yarn that I have in my box. To help the people who wanted a larger jumper than the first one, that came out at a 44 inch chest, I have been using 3:5mm UK size needles instead of the 3mm ones in the first knit. My latest jumper will come out at about a 50inch chest, which will be big and look silly on me or will look pretty cool. Either way, I will be able to tell everyone how to increase the size of the original finished chest.

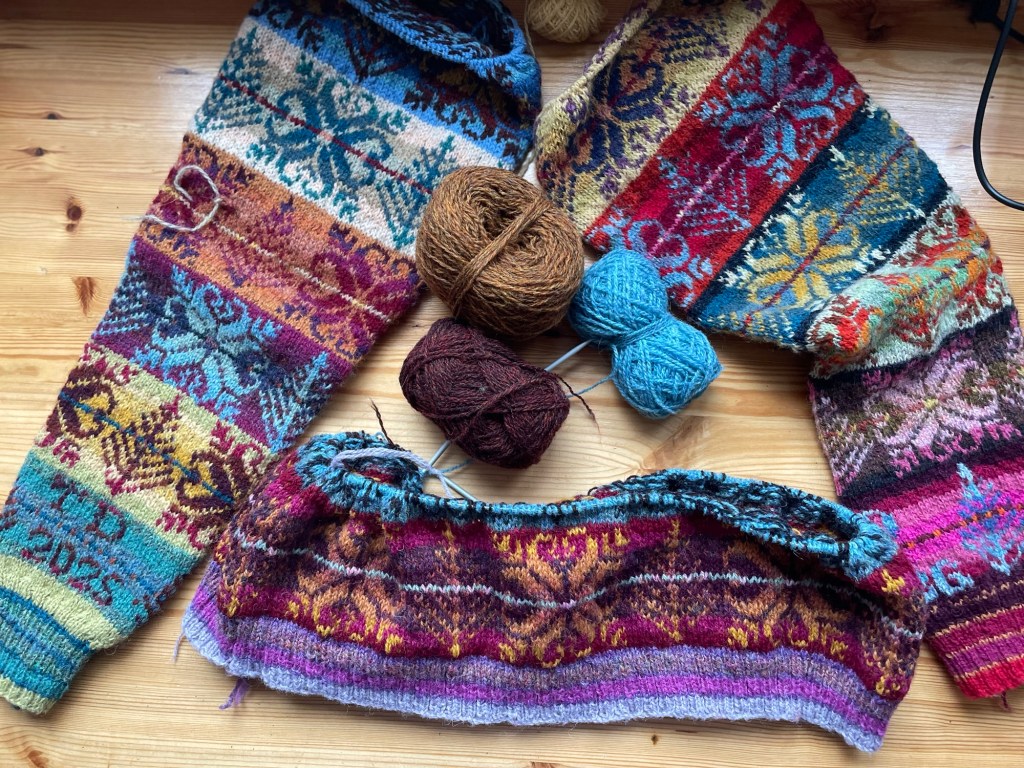
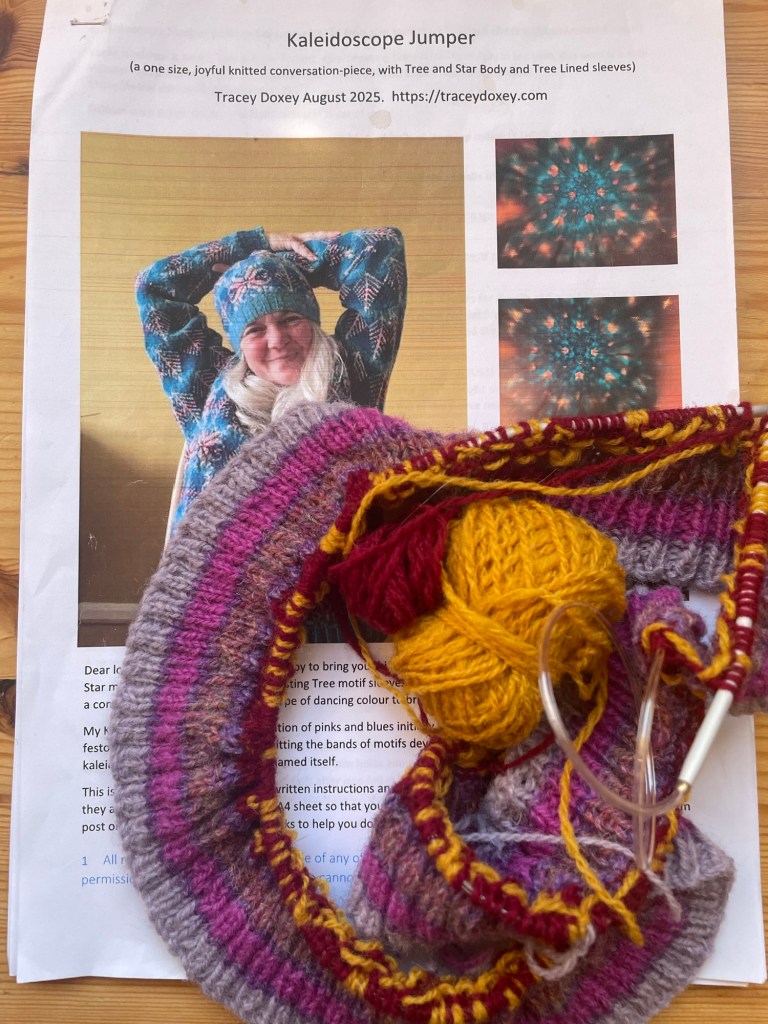
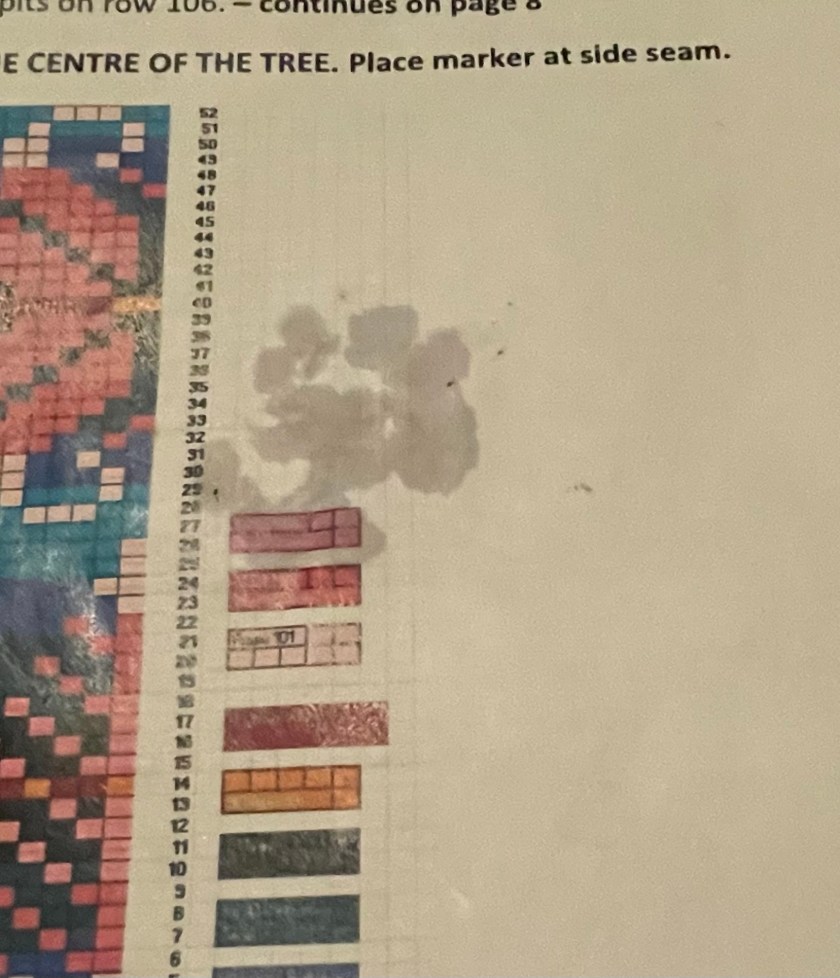
I have been knitting Tree and Star sleeves this time – which is a bolt on pattern ravelry as an option to knit other than the Tree sleeves in the original jumper pattern which you can see here.

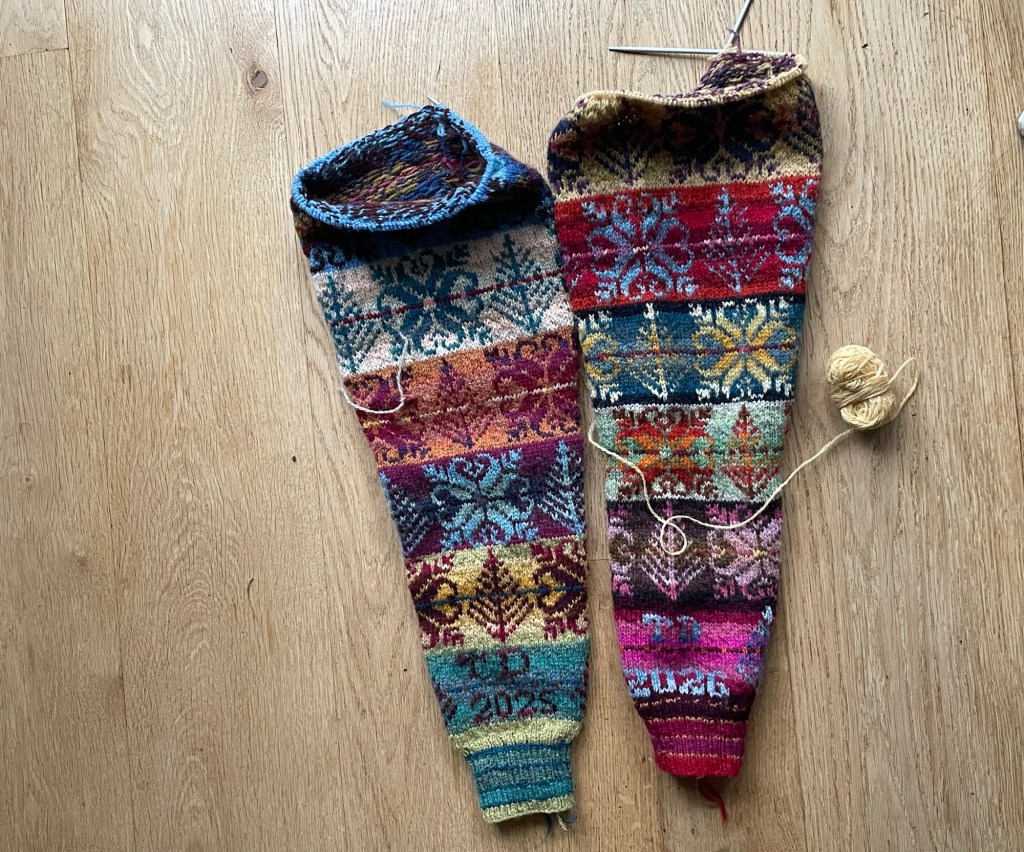
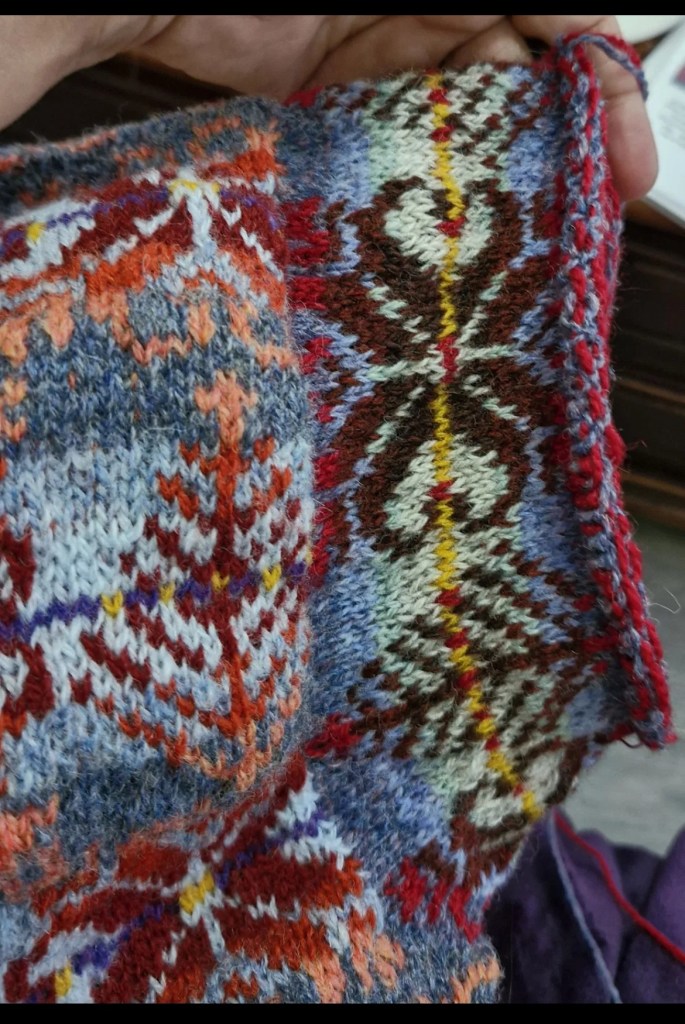
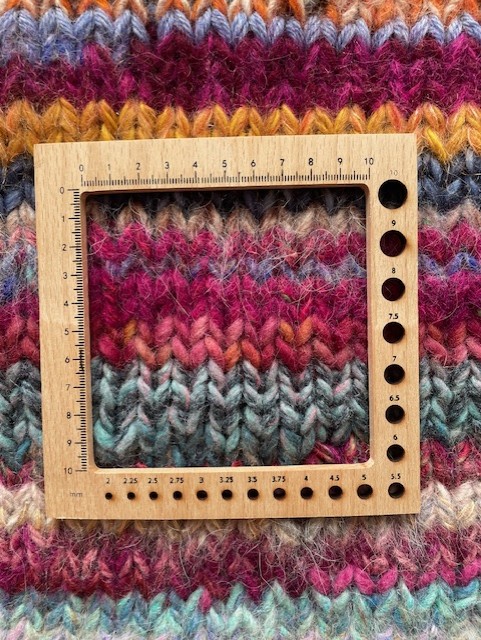
The detail that I particularly love in the bolt on sleeve pattern is that I have added a full chart of the Alphabet so that you can personalise your knitting with your initials and date of knitting it. I finished one sleeve in 2025, the other on new year’s day on 2026. So my sleeves have different years knitted into them.

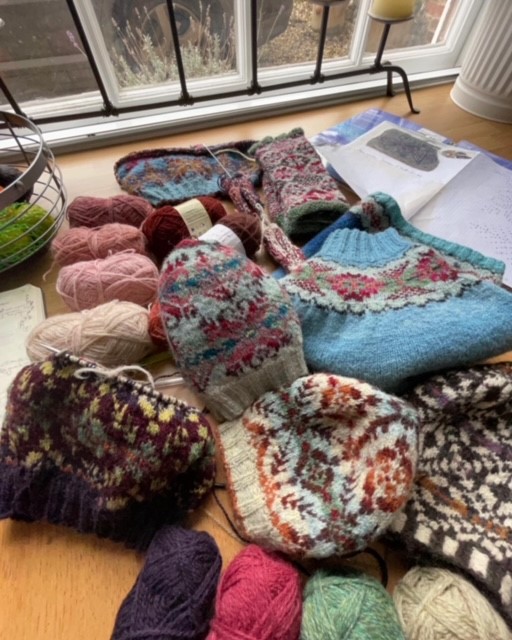
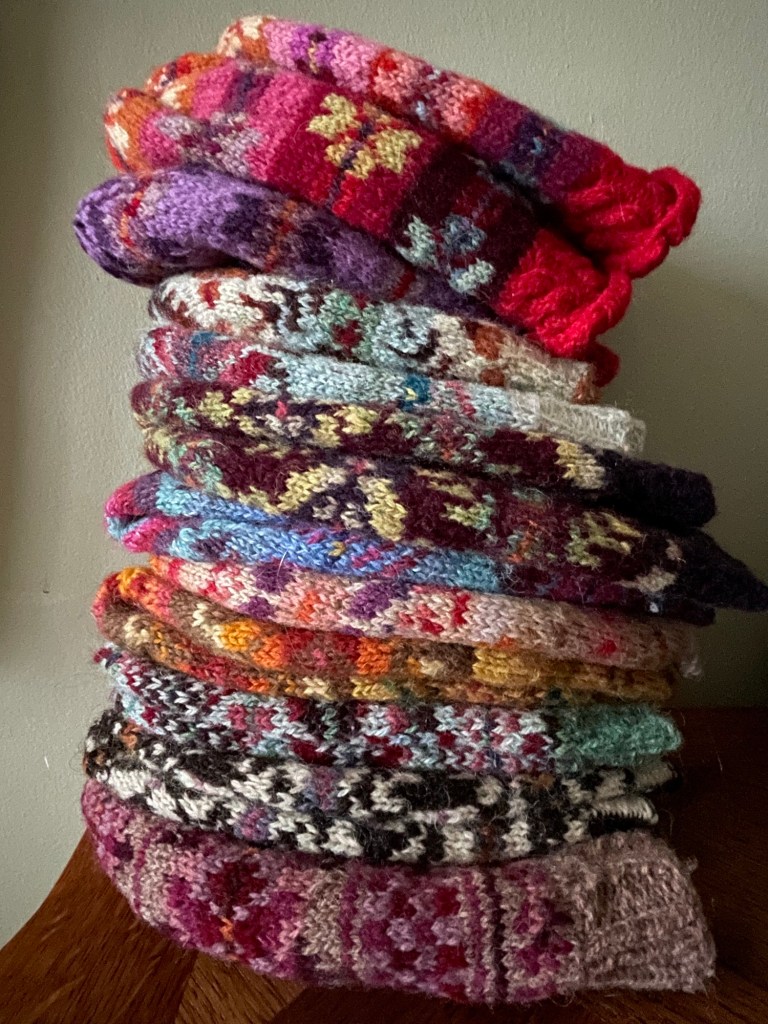
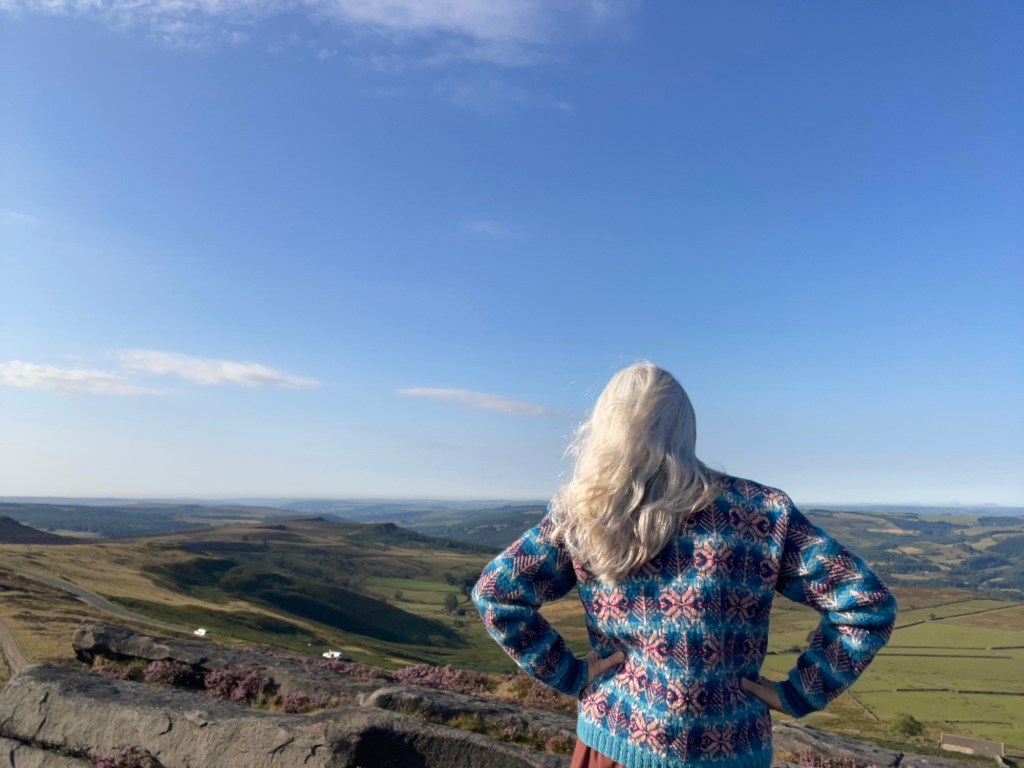
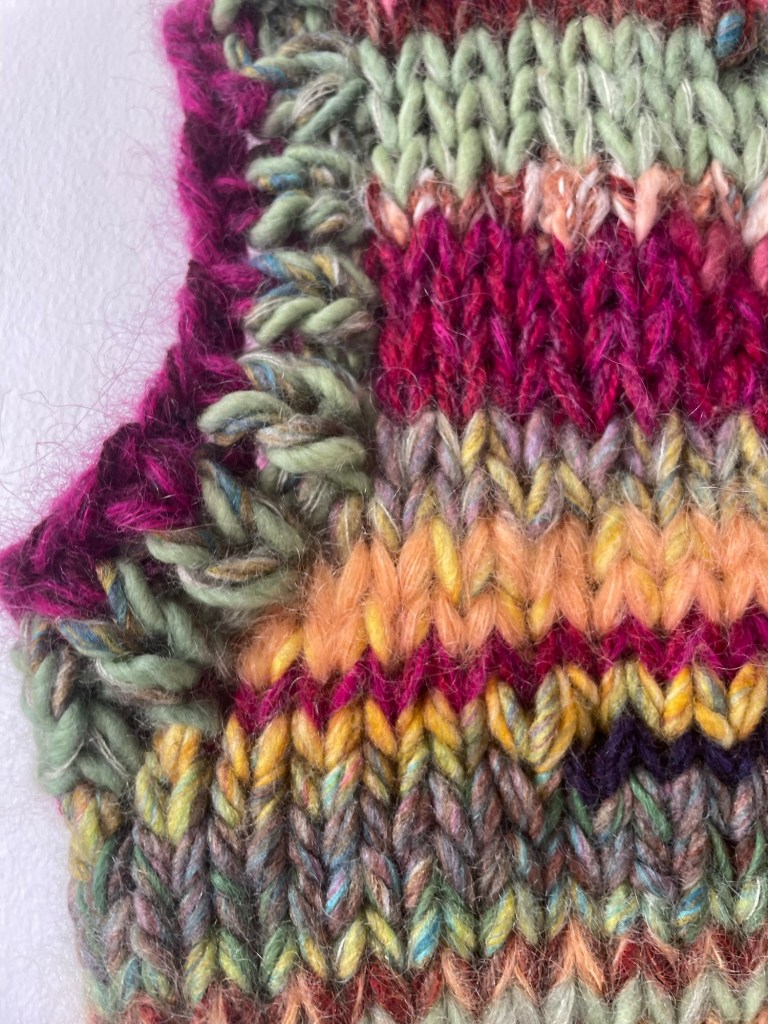
Here are some of the really wonderful Kaleidoscope patterns knitted by other knitters – they are in the projects on the pattern tab. You can see a lot more projects here

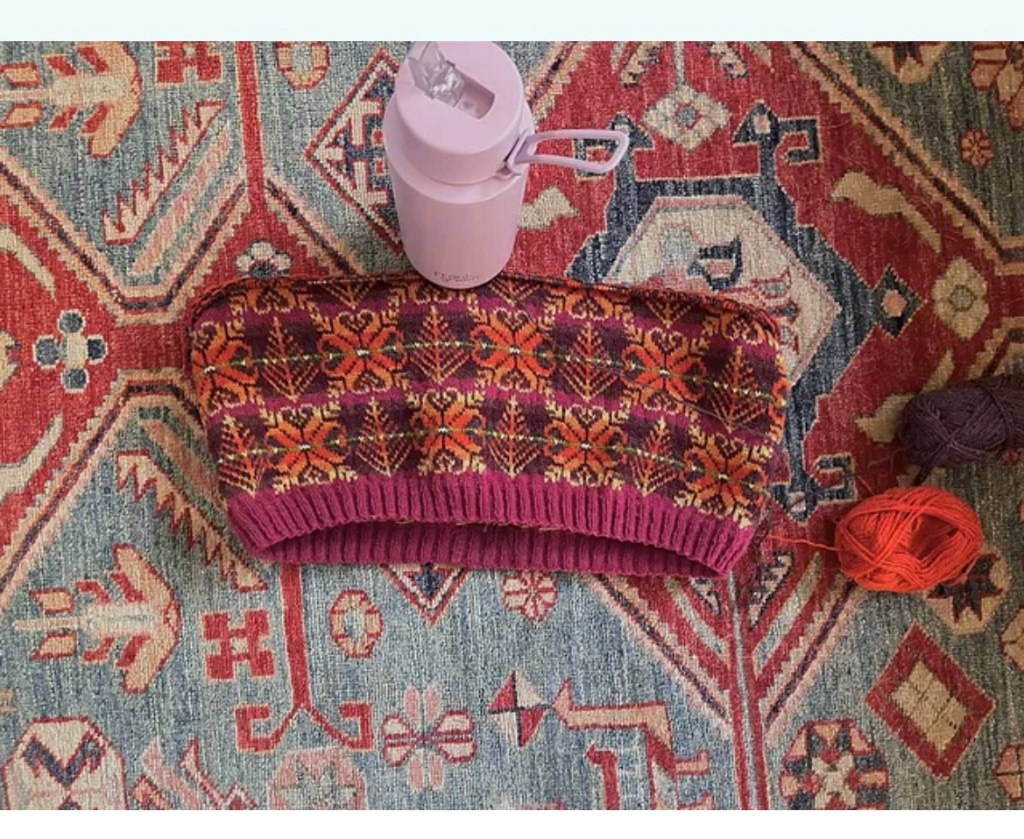
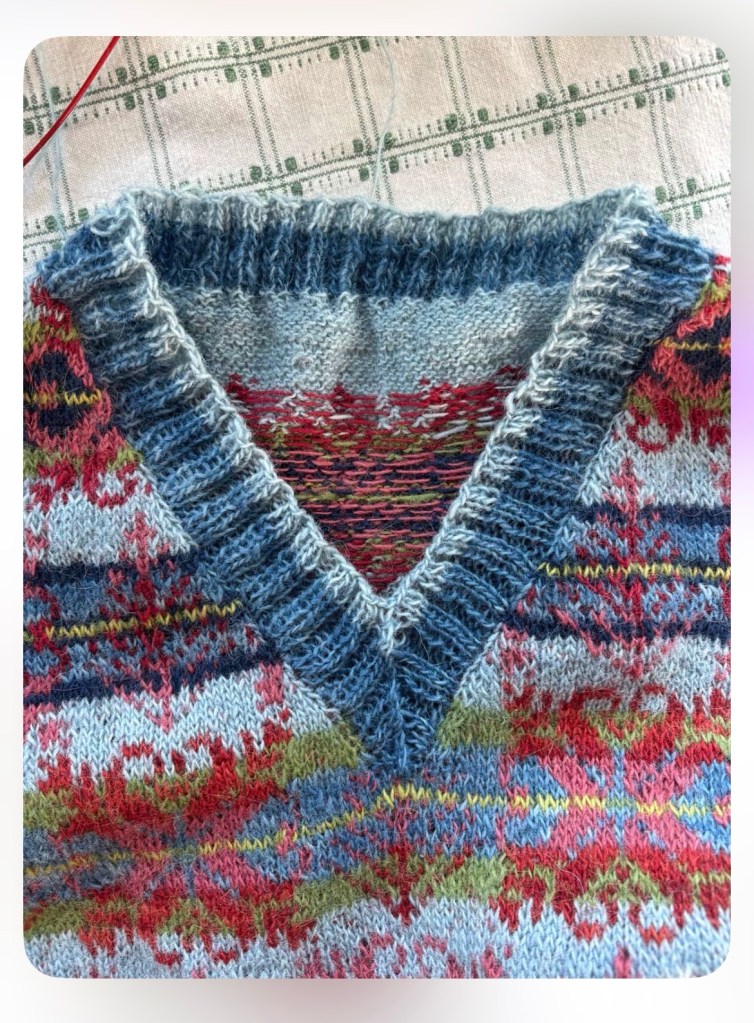
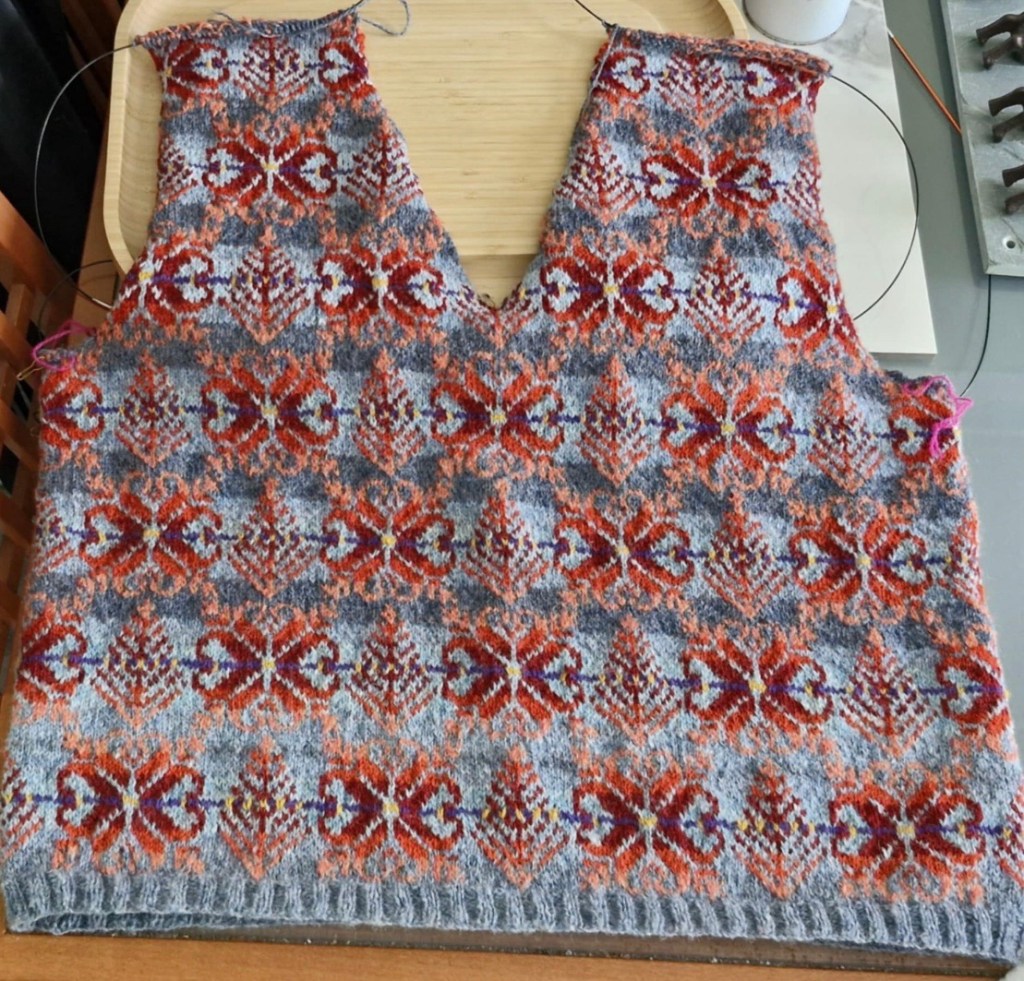
Some of them have been steeked and the project photos show you how this has been done.

Another thing that I have been doing behind the scenes is updating this website /blog which I started in 2016 when I was doing my Masters at NTU in Nottingham. I added to the home page until it was not understandable and there has never been a buy now button on my online workshops page.

The home page is now very clear, with just services listed and the workshops page, I am very excited to say, now has a BUY NOW button which takes the customer straight to paypal with easy payment methods.

image of workshops page with new BUY NOW button

Learning how to sort html, link paypal to the blog, add a button and links and update the page work for the customer more easily took me a heartbreaking 8 hours over 3 days. BUT, I finally did it.

A quick link to my workshop page is here. Give me feedback on how it looks, if you like and how I can make it better for the customer.

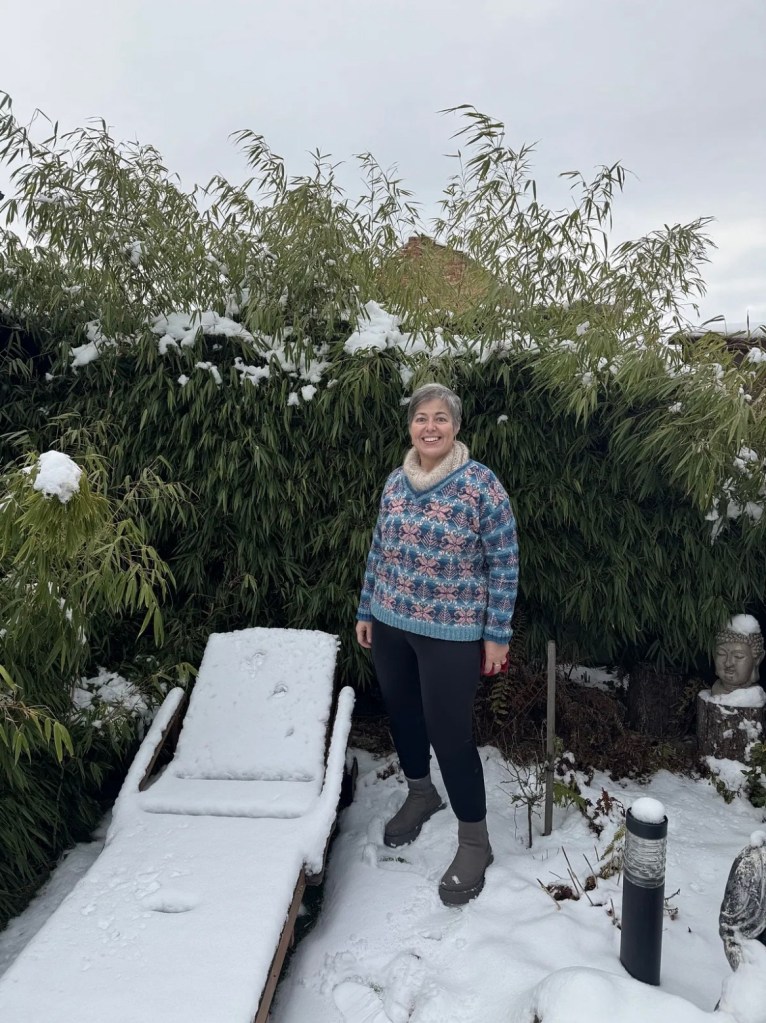
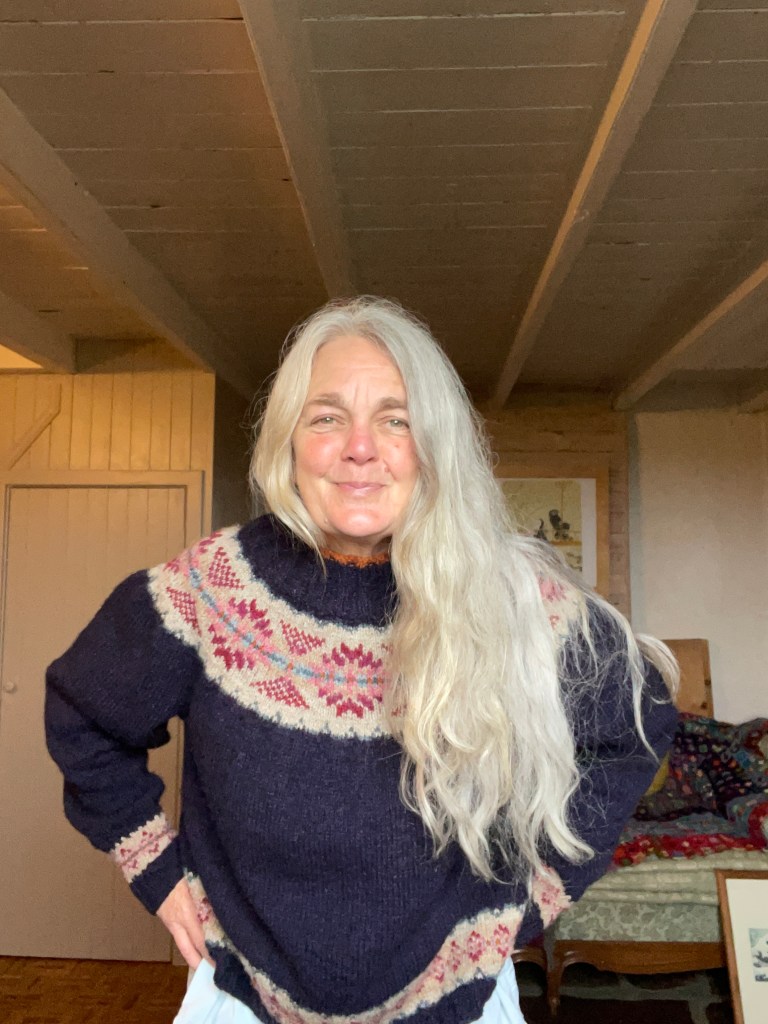
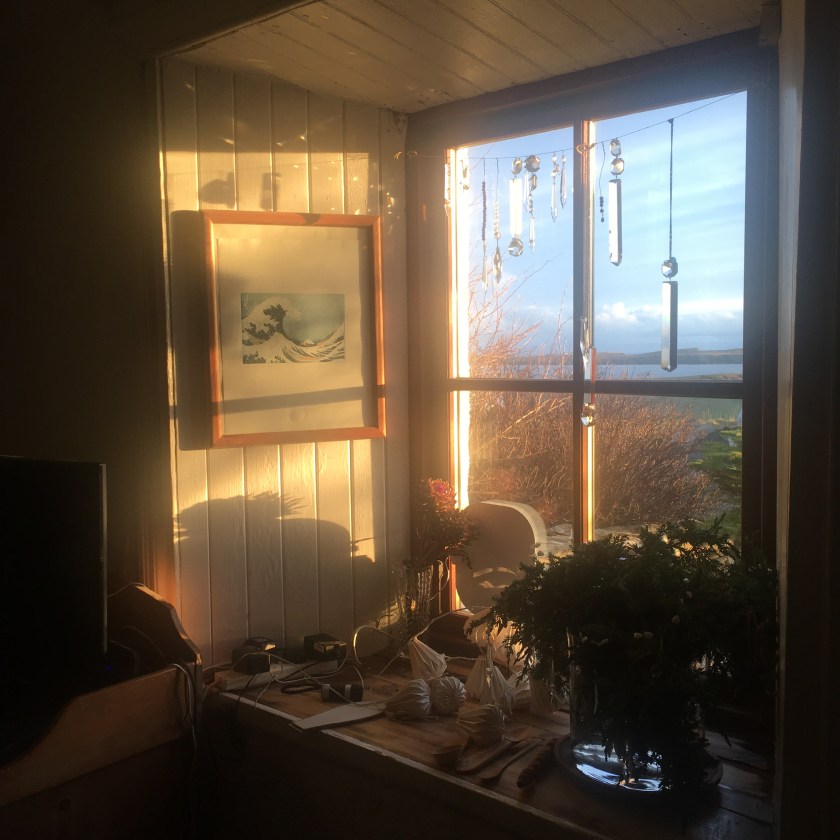
Today, has been particularly wet, after days of heavy rains. Today, never really got light – so when I say that I hibernate, I really have been staying inside.

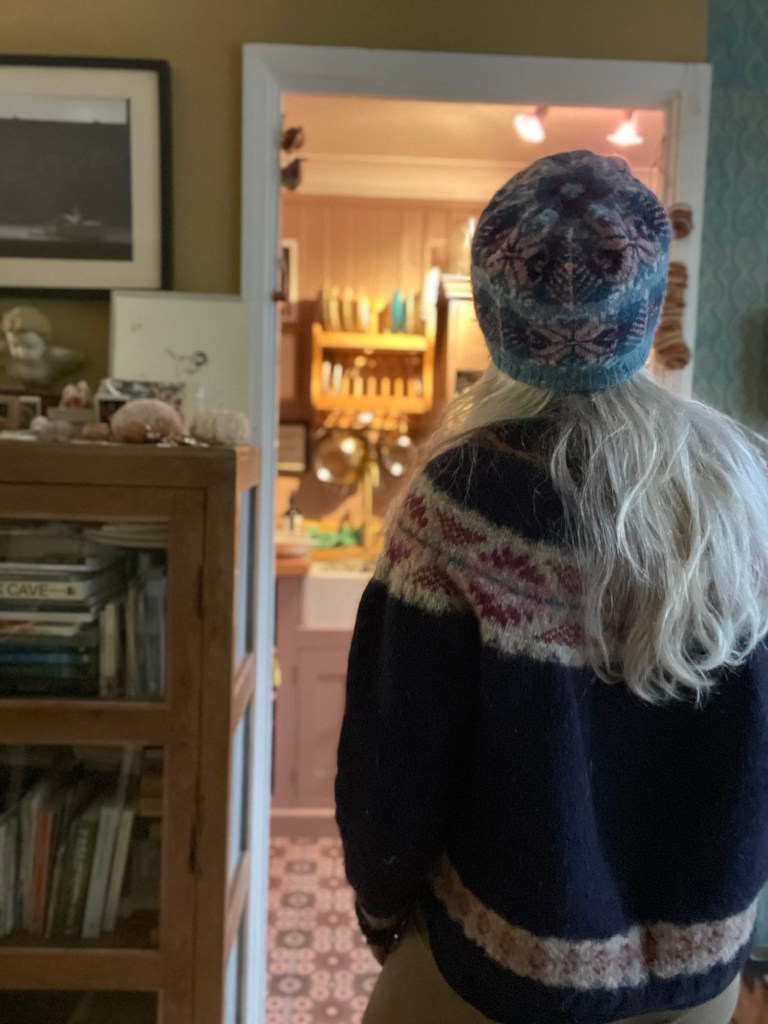
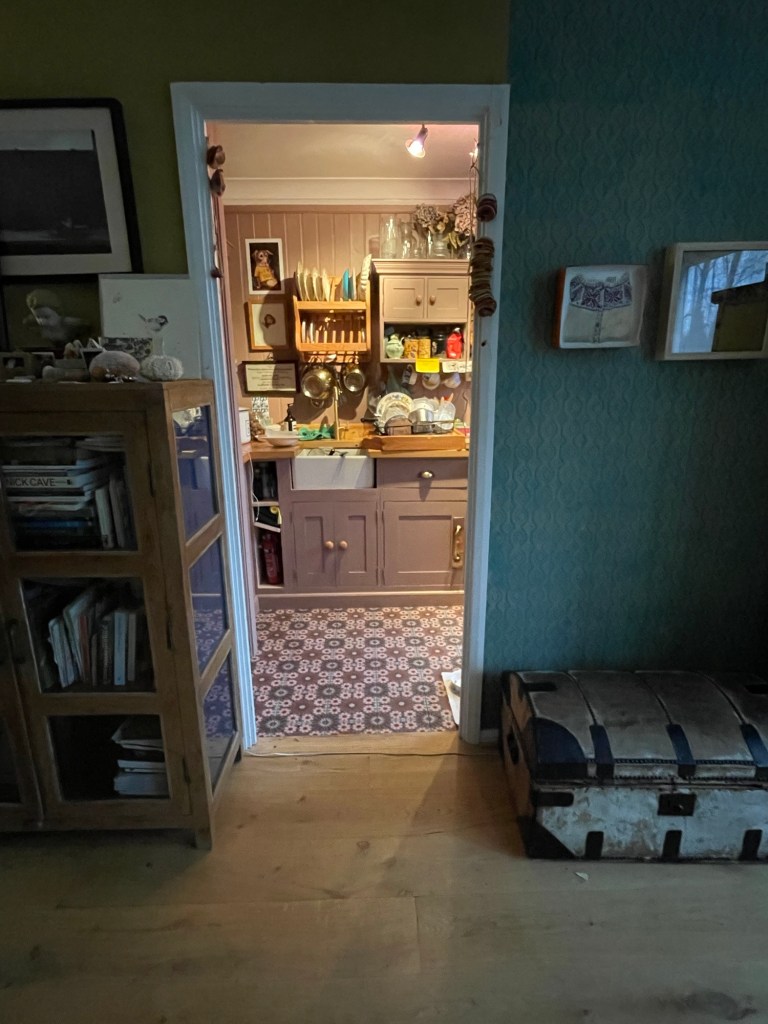
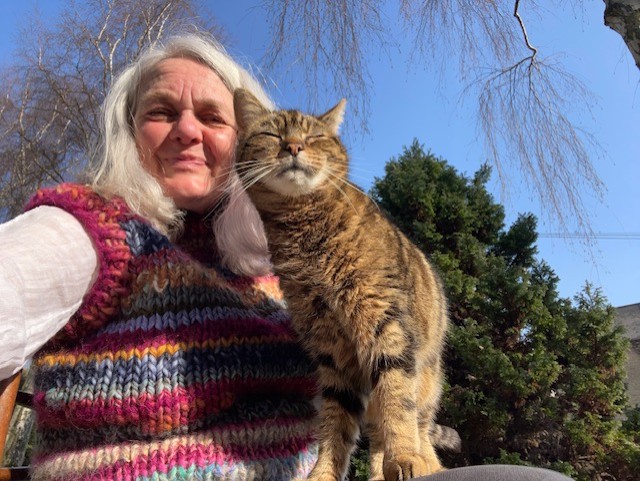
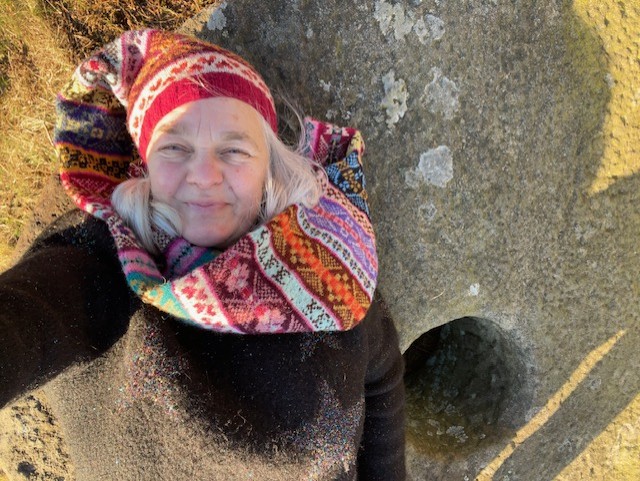
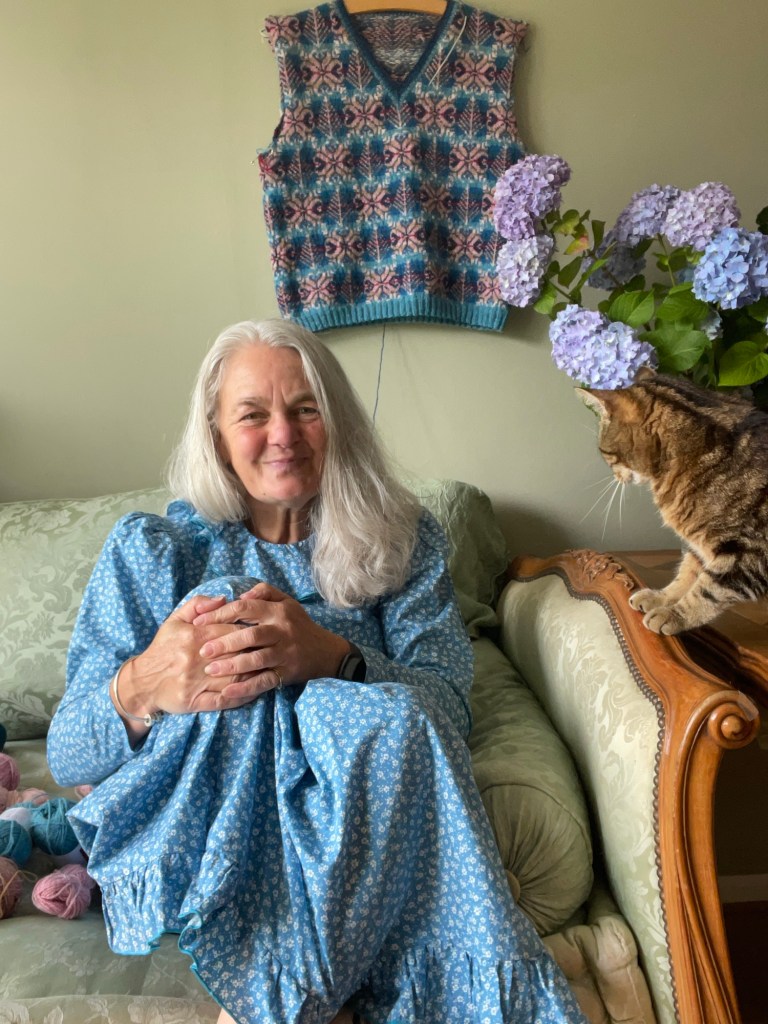
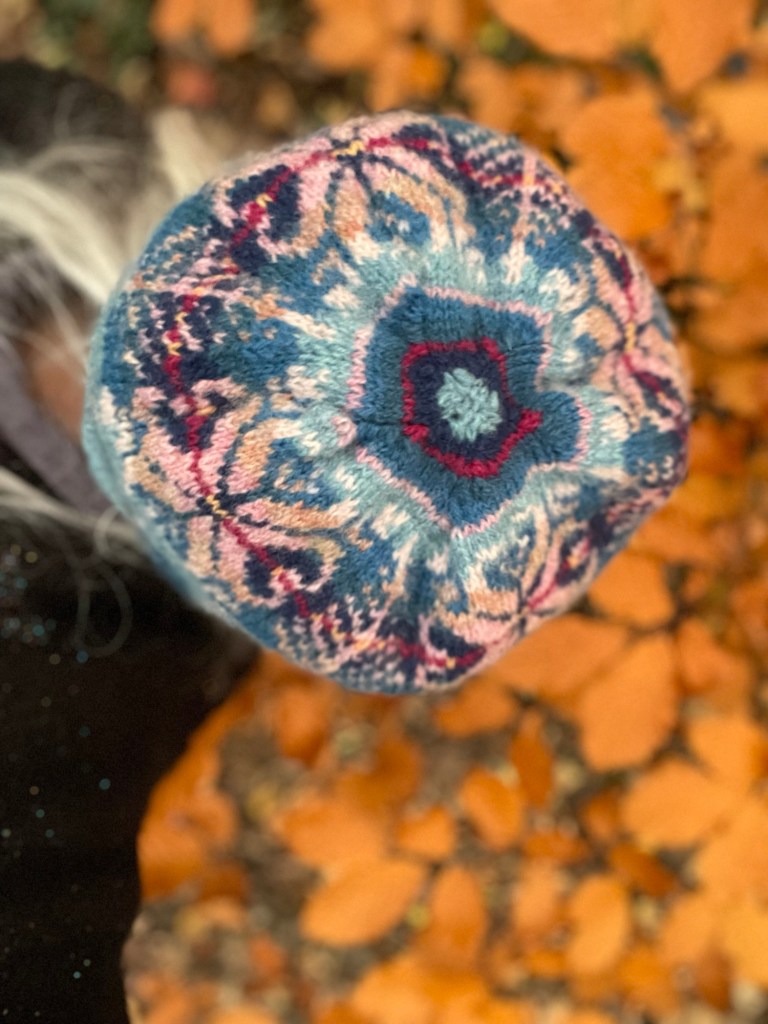
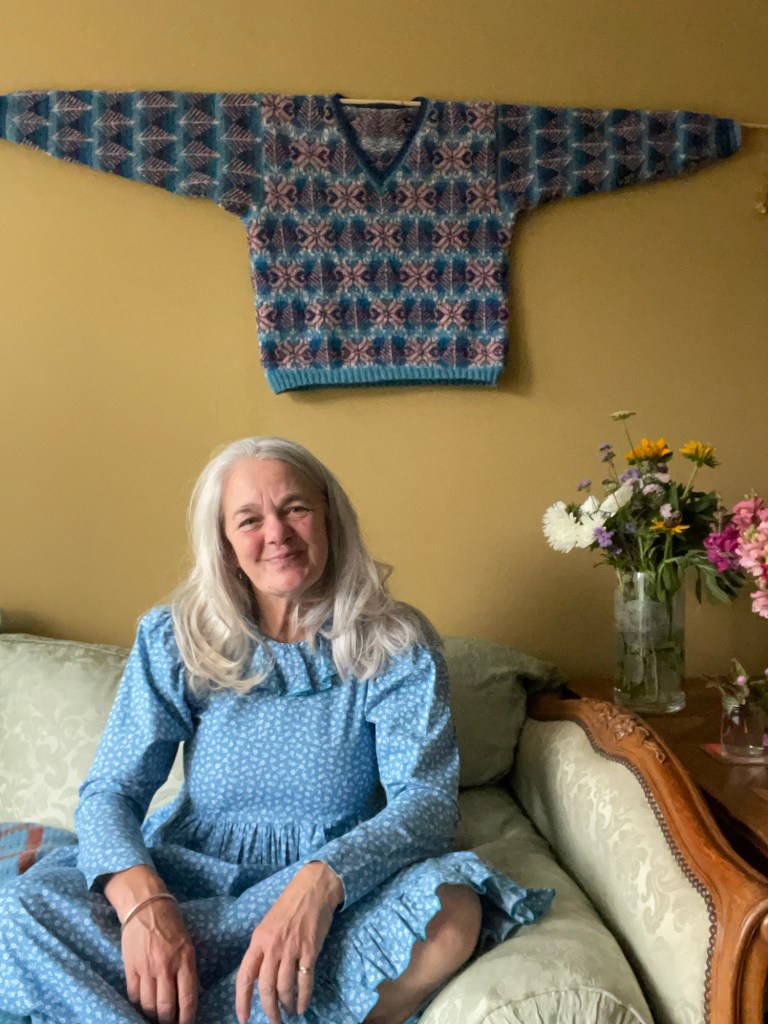
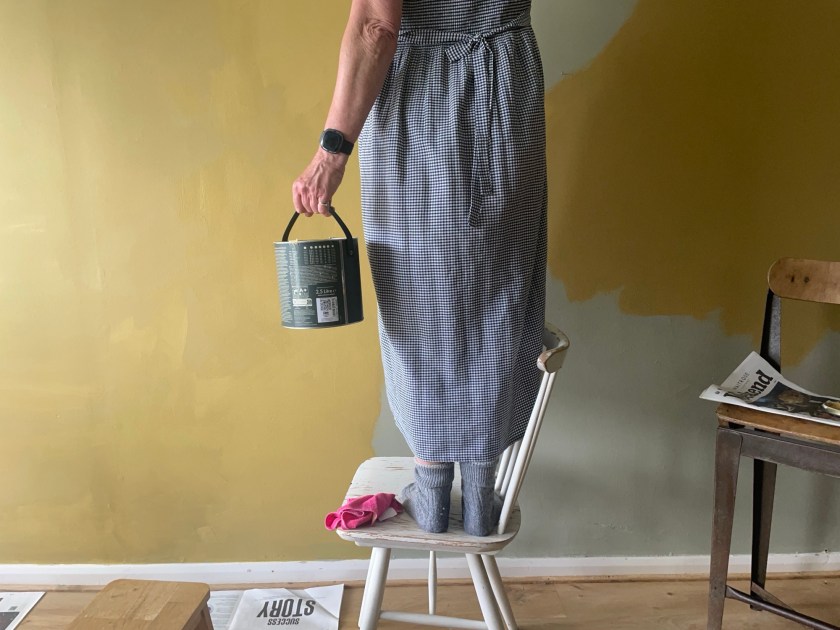
Above are a couple of photos from today – my Home Wear which includes my Tree and Star Hat for cosiness.

staying inside is not like me but it’s been harsh weather. I often see people living wonderful seemingly carefree lives in camper vans, in the forests or by the sea but lately, it would be a damp existance, in a van in England.

Another thing that has happened behind the scenes is that I have given my notice in at work. I am an Apprenticeship Coach at a University. I love my students / apprentices but after staying in Japan for a month in December, I knew that I need to begin to find myself again. I am 63 this summer and my time is precious. I am not sure whether it was the right thing to do because the part time job gave me financial and emotional stability but it also took away my freedom and made me very tired. The team at work are brilliant. We all support each other and accept every unusual quirk that we may have. There is a lot of laughter when people come into the office and I will miss that. I will also miss the photo copier. So, Onward and upward. I am hopting to use mondays as my design days from April going forward.

Comment if you would like to see anything new in my designs.

or if you want to get in touch about anything then complete the contact form below. Thanks for subscribing to these little posts. Tracey 🙂

← Back

Thank you for your response. ✨

And, if this is your first time landing here on this blog and would like to be kept up to date – then you can add your email below and you will automatically recieve updates – tips / tricks / offers.

PS, if you want to use the comment or subscribe form, you need to log onto the website to do it – these forms are not as active on a mobile view.

Easy Pattern spotlight – Chunky Knit Vest

Hi, I thought I would Spotlight one of my patterns that I was designing and knitting this time last year.

It is called the Chunky Knit Vest and that’s exactly what it is.

vest front

Quick link to Chunky Knit Vest pattern on Ravelry is here

It is a very quick and easy knit vest to knit using stash yarn and large 12mmUK needles.  It flies off the needles with great speed – mine took me three days to knit from beginning to end.   It is something to love, something lovely to knit and very useful by  using up your stash yarn – that you also bought because you loved it.

This vest is made up of chunky yarn by playing 3 to 6 yarns together to make a really nice fat yarn. Please be aware that what you make with your plied yarn maybe thicker or thinner than what I plied because it is all random but totally works out in the end because we knit by length.  Here are some visual examples from my swatch book of the yarns that I used. 

For a yarn example, you can see here I used 4 strands of mohair together with 1 strand of Lettlope or two strands of orange mohair with five strands of very thin of the yarn or, for example, one of the yarns that I used on its own was the Big Wool by Rowan  so the experimentation of yarns plied together goes on and on and the results are a surprise and exciting which makes you excited about colour knitting.

In the pattern, I recommend practising swatching for gauge.  I give you instructions on how to  measure a section of your knitting that you like and feel the drape of and how to make this work in your own vest project.

I have knitted two of these vests and I wear one in the winter and the other one was bought by a client and I enjoyed embroidering a little label for the neck which you can see it here.

The last images are knitted by Kath Ward this week which she shared to instragram and I was so happy to see.   She has been a long time follower of mine on Instagram and she normally knits lace so chose to knit this chunky Vest pattern as a rest.  It also took her three days to knit – I bet she knits another. 

She knitted one strand of grey mohair through all of her waist yarn colours to keep unity through it all. 

You can have a lot of fun with this pattern and just use what you’ve got and really enjoy it and see what happens

The pattern has 9 pages and includes images of the yarns that I used, information on how to get your gauge,  photo images of progress of the vest, finished measurements of my vest, and written instructions on how to make it

Chunky Knit Vest link here

It’s a real joy quick joy to make for yourself or for a gift or to just to use up some of that stash that you have that you’ve never touched for years but really liked. 

This is a project to use those really like lots of different yarns.

much love. Tracey

How I choose my colours for my knitting patterns

I use two types of motifs when I design my knitting patterns – Fair Isle patterns which are traditionally OXO patterns – if anyone tells you any different or says that they are knitting Fair Isle, mostly they are knitting stranded colour work, which is also wonderful but not culturally Fair Isle.

And my other knitting designs which mostly have Shetland motifs – which I colour blend.

My Fair Isle designs have been particularly colourful.  I designed the pattern as I knitted it and whilst I ran with the colours that I most love. Fair Isle motifs do not need lots of colour and always only 2 colours in each row.   But, there is a particular way that I combine my colours.  For example, for the Vest that I made for my sister, which is less colourful  than I would normally choose because I asked her what colours she liked and she said, black, grey, navy and  maybe dark red and mustard as well.   I started knitting the vest with the colours she liked best, black, dark grey and light greys for the bigger OXO motifs then used the navy or red or mustard for the smaller bands of motifs in between. But, then, I got bored so stared to add the reds and navy and mustard into the larger OXO bands – kinda forgetting any sort of order.   My favourite section of the vest is the part from the dividing vest at the armpits for front and back.  I used her colour choices but where I wanted, and if you look carefully, you can see that I contrasted the colours in each OXO band between motif and background.

we live in time exhibition piece
sisters

Here are some examples of my Fair Isle charts/ patterns – The Long Fair Isle Hat/Scarf and the Fair Isle chart.   If you would like to learn how to build your own Fair Isle vest or jumper from my Fair Isle chart, then I am running a workshop on how to do this on 15th March. 

Here are the links to the Fair Isle long/hat scarf pattern which gives you a full list of all the colours that I used as well as lots of clear easy to follow Fair Isle charts.

Here is the link to the Fair Isle Chart which gives you all of the colours for the jumper in the bottom image and also gives you full charts so that you can make your own jumper or vest. It is not a pattern.

The patterns that I make using Shetland motifs, for example the Kaleidoscope jumper, I blend the colours for the back ground and the motif,  I love colour blending.  I use between 3-5 colours in the background and 3 or 4 colours in the motif, which gives the knitted article more of a rich colourful knit.  I go for a glow. 

here is a link to my latest design – but actually, the Dear Susan, Easy Aran jumper pattern which is a very quick and easy knit, also has colour blending on the yoke, cuffs and above the rib.

All of my patterns give clear instructions which row to change your colours but if you would like to do a Colour Blending Class, I have one running on 14th March.

new online classes are here

My favourite way to use colours in my patterns is to blend them. 🙂 let me know in a comment how you like to use your colours. and if you would like to subscribe to my posts – just fill in the subscribe box below and you’ll receive any new posts.

Fair Isle Vest and colour blended sleeves for my 2nd Kaleidoscope jumper

I cannot wait to pick up my knitting again 🙂

Small Independent knitted stories.

I try to design beautiful knitted articles but they may not be considered interesting. All of my designs are meaningful to me but of course they will not be meaningful for others. All of my patterns also have a story embedded within them often from inspiration of place, people or colour But my stories are also not that meaningful to other others. 

And big yarn companies that make patterns like Rowan or Sirdar, don’t genuinely take inspiration from real places or people that they’ve met. They often start with a mood board which has no integrity within the finished article so how do independent designers like me make a living from our creative practice? 

Well, the answer is we don’t. I work at the university 2 1/2 days a week to pay my bills then I do my house jobs, care for the cat and manage the car and daily tasks and try to fit my creative practice into the time left for me, which can be hard when so many other other things take up my time

Independent designers do their own marketing, promotion and social media – responding to comments on Instagram and writing for the website to promote my creative practice. But then if I do sell a pattern for say, £4 Ravelry take 10% and then so do Paypal so I get about £3.20 for probably three months work to design Knit, test knit it, write the pattern – And that’s if I sell any at all.

I don’t have funding like a lot of creative practitioners, nor financial support so I want this post to say a big thank to you if you have ever bought a pattern or been on one of my workshops with me which showsme that the hard work that I’ve put in over the years has not been wasted and now, when I do finally get time to sit down and knit – my cat sits on top of me. 

Here is a spotlight on my favourite pattern that I have ever designed at the moment and it’s the kaleidoscope jumper with add-on sleeve pattern and matching hat. I love wearing this jumper and always receive so many beautiful little comments about it so from one independent designer to whoever it is reading this Thank you for supporting us

Here is the Kaleidoscope Jumper pattern

And here is the link to that alternaitive Tree and Star sleeve, if you prefer to have the sam motif for the sleeve as used in the body.

Thank you

Finding Colour Confidence

Finding Colour Confidence: Trusting Your Eye and Your Yarn 

I often have comments on my posts about how people like the colours that I choose.  They look at all those colours — beautiful, bright, blended or contrasting and say that they don’t know how to choose their own colour combinations successfully.  

I used to feel the same way. 
Choosing colour felt like a test I hadn’t studied for — as if there were secret rules I hadn’t learned. 
 

My colour journey started after I went to Shetland to stay on Fair Isle with Mati, then at Brindister just before Christmas of 2019.  At Brindister, I found Sea Urchin shells scattered on the hill beside the voe.  I began to name the place Sea Urchin Hill and really took notice of the colours and form of the dried Sea Urchin Shells after the sea gulls had eaten the urchin.  

In Jamieson’s of Shetland, in Lerwick, I bought colours that I felt worked for me for a new hat project.  By then, I had started sampling colours but still didn’t know what I was doing.   When I got home from Shetland, I started the Sea Urchin hat pattern with light background and a darker coloured Shetland Tree and Star Motif.  And that is where the story of my colour blending started I laid two yarns together on a whim: a stormy and washy blue skies and a flash of dark reds and purples from one of the shells that I had seen.  


It shouldn’t have worked — but it did. It looked alive. 
And that was the start of learning to trust my inspiration and eye and I began to blend the colours.  

What Changed 

It wasn’t that I suddenly “understood” colour blending – my swatch book will show you that but it was that I stopped trying to get it right and started trying to get it interesting and understand the changes in tone and colour.  
I began to notice colour in the world around me — the copper of old bricks, the green of moss after rain, the pink glow of dusk. 
Nature never worries about matching. It just works. 

That’s when I realised: 
Colour confidence isn’t about knowing rules — it’s about paying attention, and being willing to play. 

Small Steps to Build Colour Confidence 

1. Start with Inspiration, Not Theory 
Forget the colour wheel for a moment. 
Go for a walk, look through a photo album, open your wardrobe. 
What colours feel like you? 
That’s where your palette begins. 

2. Work With What You Have 
Lay out your stash and make little “yarn bouquets.” 
Mix fibres, tones, and textures — even scraps. 
Sometimes the most magical combination comes from leftovers you’d never thought to pair. 

A Palette from the Everyday 

This week I took a walk through Sheffield woods — everything was damp and glowing. 
There was soft lichen green, deep bark brown, a sudden flare of orange leaves against a grey sky. 
When I came home, I pulled those colours from my stash and swatched a few rows. 
Instant calm. 
Sometimes, the best palette comes from the ground beneath your feet. 

Confidence Comes with Play 

Colour confidence isn’t something you’re born with. 
It’s something you knit into being — loop by loop, swatch by swatch. 
Every “wrong” colour combination teaches your eye what it loves. 
And every small experiment builds courage for the next. 

looking at all the colours to really see them

Ready to find your own colour confidence? 
If  you want to learn more now, and would like to join my exclusive small Colour classes of 6 people, then,  I do teach colour blending workshops online and the information is here

You’ll get the Sea Urchin Pattern free to work with after your workshop. Many people have joined me in the Colour Blending sessions from my first workshop in January 2021 – held in the window sill of my window in Shetland looking out to sea.  

Now, I still teach but not often, so if you would like to grab a space, there is only one left for Friday 9th Jan and 4 left for Saturday 17th Jan.   So please get in touch using the form on the workshops page.

If you have knitted the Sea Urchin hat pattern, please tag me on instagram because I do share other people’s knitting using my patterns.

Happy successful colour work knitting 🙂

Tracey

Tree and Star Hat pattern last week above the burning copper coloured fallen leaves

Bolt-on, Tree and Star sleeve pattern.

Above is an image of the alternate sleeve to the one that is included in the Kaleidoscope Jumper pattern. It is a Bolt on pattern called – Tree and Star Sleeve. Below are reasons why I published the pattern with Tree sleeves charts only and why I am producing a 2nd bolt on sleeve pattern.

Below are A Few Notes from the last page of my Kaleidoscope jumper pattern to explain some of my decisions.

Why is the Kaleidoscope Jumper pattern one size only?

It iis one size because the motifs of 44 stitches, dictate wherre the pattern lies – to increase the size, I would have to add one more motif, change where the neck lies in the pattern and calculate additional decreases at the shoulders and it would go on and on. I t would take e 6 months to make different sizes. I am just one person without tech support. It is actually easy to increase the size by knitting the jumper in UK 3:5mm needles rather than UK 3mm

Why did I knit the sleeve in the round from cuff up then graft it into the armpit?
Here’s the reason that I did the sleeves this way.  Initially, I picked up the stitches around the arm hole to knit the sleeve in the round from the shoulder down to the cuff but I realised that if I knitted the tree motif, from the trunk first, as usual, the trees would be upside down, ending with the tree top at the cuff.  So, I turned the motif around and swatched the tree from its top down the trunk base so that I could knit the Tree only sleeve from the armhole.  But, knitting this way resulted in the stitches of the tree motif being visibly upside down starting from the shoulder, and I didn’t like that either.   You can see the swatch on the right and how the stitches are visibly the wrong way.  It is possible to do it this way but it will always look somehow upside down.  But, if you want, you can knit the Tree sleeves from the armpit down to the cuff, with upside down motif stitches,  it is your choice.

note upside down stitches

So, I knitted the sleeve in the round from the cuff up then joined it at the arm hole by grafting it expertly into the armpit hole. I needed to explain why I knitted the sleeve this way as it might seem a little weird but the result is perfect trees knitted from the cuff up and all the stitches are perfectly the right way. I thought that doing the sleeve this way is worth this extra consideration in the name of neatness and accuracy

Why does this jumper pattern only have Tree sleeve charts?

I did a poll on Instagram and my website to ask what people which sleeve they would like for the jumper pattern. Hundreds of people answered.  The options were: – 1: – just Tree sleeves or 2: – just Tree and Star sleeves which are the same as the body, or 3: – Both sleeve charts.  Most people said that they would knit 1: – Tree sleeves only, but some wanted both charts, just in case.  When asked if those people would consider paying more for the option of both sleeves to be included in the one pattern, even though there was more work charting a 2nd sleeve, knitting it, and writing a full pattern, they mostly said no.     So, I have happily knitted Tree sleeves in my Kaleidoscope jumper because most people requested this and the Trees look a wonderful companion pattern and compliment the body.

What about the Tree and Star sleeve?  Where can I get it? 

My test knitter has knitted the Tree and Star sleeves, which are the same motif as the body.  The Tree and Star sleeve chart pattern along with the Sanquhar alphabet pattern to enable you to add your initials and year of knitting to personalise your work, will be released separately to the jumper pattern, as an add-on so that the knitter can make their own choice of sleeve.  The name of the bolt-on pattern will be, Tree and Star Sleeve Pattern. The reason that this is a separate bolt-on pattern, is because of the extra work to design, create and knit it as well as write the intricate charts and pattern notes.  Plus it gives the knitter the choice to just pay for the original pattern or pay extra if they want and extra design.

So, if you would like to buy the Kaleidoscope pattern, it is here

I am also knitting a swatch of how to add your initials and the year when the jumper was made, into the sleeve, just above the cuff, in the Bolt on Tree and Star Sleeve pattern that will be out this week.

Thank you to everyone who has bought the Kaleidoscope Jumper Pattern it is here, if you want to go check it out.

Let me know what you think about the options for a 2nd sleeve pattern.

Kaleidoscope Jumper pattern

This is a frank and honest request.


If you buy my kaleidoscope pattern when I release it this weekend, please do not forward or share it with your friends or family or knitting group.


This pattern has taken 4 months of my life. I started at the beginning of May and have spent between 4-6 hours every day, either charting, designing, knitting, promoting, writing blogs, sorting yarn for test knitter, liaising a lot with test knitter, rewriting, printing, reading the pattern, updating charts,altering pattern and constant knitting and figuring out ways round things. When the pattern is released, ravelry charge about 10% and then PayPal always take 10% from the payment. So, my life has been poured into this pattern.


It and I have a value.
PLEASE do not share patterns.
Everyone is happy to buy lots and lots of wool, so please think of the actual design. End of Frank and honest discussion. Let me know what you think in the comments

I am releasing the pattern at the weekend, however, there may be a soft release earlier and I think if you are signed up to my Ravelry, as a ‘friend’ then you hear the moment the pattern comes out.

I would love to hear your comments, and follow me on instagram for lots of regular updates

After the release of the kaleidoscop jumper pattern, there will be the release of an add-on alternative sleeve pattern for the jumper. I am excited about that. Here is ravelry

here is information on why there will be an add-on pattern

Why does the Kaleidoscope jumper pattern only have Tree sleeve charts?
I did a poll on Instagram and my website to ask what people which sleeve they would like for the jumper pattern.
Hundreds of people answered. The options were: – 1: – just Tree sleeves or 2: – just Tree and Star sleeves which are the same as the body, or 3: – Both sleeve charts.

Most people said that they would knit 1: – Tree sleeves only, but
some wanted both charts, just in case. When asked if those people would consider paying more for the option of both sleeves to be included in the one pattern, even though there was more work charting a 2nd sleeve, knitting it,
and writing a full pattern, they mostly said no. So, I have happily knitted Tree sleeves in my Kaleidoscope jumperbecause most people requested this and the Trees look a wonderful companion pattern and compliment the body.


What about the Tree and Star sleeve? Where can I get it?

My test knitter has knitted the Tree and Star sleeves, which are the same
motif as the body. The Tree and Star sleeve chart pattern along with the
Sanquhar alphabet pattern to enable you to add your initials and year of
knitting to personalise your work, will be released separately to the
jumper pattern, as an add-on so that the knitter can make their own
choice of sleeve. The name of the bolt-on pattern will be, Tree and Star
Sleeve Pattern. The reason that this is a separate bolt-on pattern, is
because of the extra work to design, create and knit it as well as write the
intricate charts and pattern notes. Plus it gives the knitter the choice to
just pay for the original pattern or pay extra if they want and extra design.
I have also test knitted the Tree and Star sleeve with my initials and the date above the cuff, as a swatch.
But, for now, I am most pleased to present you with, by popular demand, my Kaleidoscope jumper pattern which
has only a Trees sleeve pattern and instructions.

Test knitting with me.

About 4 months ago, I put a call out for anyone who has knitted my Sea Urchin hat pattern or my Tree and stars hat pattern and would like to do a test knit of my latest design, then, to get in touch. A lot of people got in touch but had not knitted any of my patterns, so didn’t know my style of writing, or when they found out the project was a jumper, they pulled out.

my trusty Test knitter, Mary stepped in and I sent her a box of yarn.

test knit yarn box.

It’s costly to test knit and the yarn that I sent Mary to use or choose, would have cost me over £100. I have supported Mary with alignment and will help with the mitred V neck and graftin the sleeve into the arm hole.

So, she learns too.

I put a poll out for which sleeve should I finish my jumper with? Normally, I would do 2 different sleeves to both test knit and because I like to design that way but the overall winner for the choice of my 2nd sleeve by over 100 comments was for me to knit a 2nd sleeve in the trees design. So, Mary, will knit the test knit in tree and stars ( I think I will do a 3rd sleeve in completely different colours to test it also)

The thing that came out of the polls were that some people wanted just trees but said that I should add both charts for both sleeves and that set me to thinking about all the extra time taken to chart, swatch, test, hand knit, alter a 2nd sleeve just to give an option in a pattern. I don’t think that pattern buyers think about the time taken to write a full pattern and to add extras is doing it for love.

My pattern will have 2 different charted sleeves. It will take longer and more work. But I hope that you will all find that it is worth it Because I am absolutely loving this jumper as it grows.

Over the weekend, I added a 10% discount offer on the Tree and Star hat, if anyone wanted to Get Ahead with learning how to knit the Kaleidoscope Jumper. I forgot to add the offer to my website followers so I have just extended the offer until midnight tomorrow night.

10% off the Tree and Star Pattern until Midnight UK time, Monday 4th Aug

the pattern is in the link above and there’s no discount code, the discount is taken in your basket.

I’d love to hear your thoughts on which sleeve you will be knitting, but, until then, here’s the armhole, waiting for my 2nd sleeve and here is the matching hat. I can’t wait to wear them as a twin set when I hope to visit Japan in December.

Tree and star hat pattern here

Behind the scenes of my latest design

Last week, I painted the walls in my sitting room. It has been difficult to get the exact right colour because of the light in the room – Finally, I landed on a Little Greene paint by the name of Bassoon. It is perfect, deep in tone but light in colour – it’s the colour of wet sand – good wet sand.

The colour has completely elevated the room and opened my eyes in a different way as well as bringing joy to the space that I haven’t felt in a long time (if ever)

Tiggy watched over my labour and didn’t budge an inch – he hasn’t faired well in this heat, so I have been a little worried about him

This morning, I am not in work until after lunch time, so I have taken time to spend with my new design, updating the pattern, rewriting the sleeve and staring at my beautiful yellow wall. I am really enjoying my new design. It will have at least 8 pages of charts to help you as an aid with decreases and shaping. There will also be 2 alternative sleeves so that you can personalise it in some way to suit your own tastes. So, on my workdesk at home this morning, are swatches of sleeves and how they will knit up and fit in, updates in my design book and I have started planning a meet up saturday morning here in my ground floor flat in Sheffield for knitters to come together, talk, learn, share and I will also be on hand to offer advice, share patterns and yarn. If that is something that you are interested in – then get in touch via the contact page.

here’s the latest pages in my design / swatch book

swatch / design devlopment book

It would be lovely to do this full time – so if you would like to support me, please buy my patterns here, join me in my online workshops or you can buy me a kofi in this link 🙂 and I will name you when I buy the drink

Big love from Tracey – constantly learning, constantly knitting, constantly trying to make exciting work. If you enjoy my work, give me a comment 🙂

New Chunky Knit Vest pattern

I’ve made something completely different to what I normally knit and instead of it taking 3 months or more to make, it took me 3 days.  It is a very easy, quick knit vest. There is a lot of pleasure in such a fast growing knit and I have made a pattern so that you can also knit it.  The pattern uses your stash yarn.

If you want to look quickly Here is the link to the pattern, and for the first 24 hours of sales, I will donate £1 per sale of each pattern to the RSPCA in Sheffield – because that is where Alfie cat, was rescued and they are a wonderful animal rescue centre.

The pattern for the Chunky Yarn Vest is made by using stash yarn. I made mine by using some that I have had for 10 years or more.  Anyone with a stash of yarn can make this vest.  It is a very sustainable project – using what yarn you already have but if you would like to make it but don’t have a stash, then I have listed some of the yarns that can be used and given examples in the pattern.

But, I thought it would be good to use what we have already. You have bought your stash because you have loved it at one time or another. If you collect yarn, now is the time to have a go and use some of it to make something that you’ll love wearing. This is the perfect project to use lots of bits up.  Any amount of bits of chunky or plied wool will work.   For my yarns, I tended to go soft and fluffy

The vest is made by using  one chunky yarn or by plying 3 – 5 yarns together to make a chunky yarn. Please be aware that what you make with your plied yarn, may be thicker or thinner than what I plied, which makes precise pattern writing for everyone impossible, so, I have written this pattern for the exact stitches and size used to create the two vests that I have made.

You will need to swatch to get a gauge similar to or the same as the one I made up. My test knitters managed to make the same gauge for their knits and No two vests will ever be the same.

The knitting pattern works best with extra chunky yarn or for you to play around and ply 3 or 4 strands of thick yarn together or one extra chunky yarn with a strand of mohair or 2 strands of Aran yarn together or 2 double knitting yarn with 3 strands of mohair, or by mixing yarns together to give a marl look.

What I was aiming for was a variety of beautiful colours to use up my stash and to have fun whilst making something to wear that I love.

The end result is VERY FORGIVING and it stretches width ways.

The pattern gives you information on brands of yarn that I used from my stash and photographs of the yarns and how I mixed them.  But really, this stash buster project is for you to use your yarns, which will be different to mine and it is a very personal project – you can see that by looking at the test knit image of her vest made by Annie against my striped chunky knits.

The pattern also has photo examples of how to knit the neck area, easy to follow written instructions of how to decrease the stitches around the neck as well as measurement and stitch conversion table giving you exactly how many stitches I used to make this vest.

There is another thing that I think will unexpectedly happen – which is that you will feel it is cathartic to use up yarn that you have had for years, so that it is not wasted.   In this case, the project will cost you nothing now – just what you have put away for some time. 

I knitted my 2nd vest after my cat, Alfie died.   I found it very calming and relaxing to make it, when I was feeling very sad.   I bought the yarn for this vest so that I could knit it for a 2nd time alongside my test knitters.  I loved the outcome.   I made it a little hand sewn label for the back. 

I will be selling my 2nd knitted vest, which you can see in the photos above. It fits a 36 – 42 chest easily.  When flat the front measures 20 inches but stretches to 22 inches.  It has my little ‘Doxey’ hand sewn label in the back and it is really comfy and warm.   If you would like to buy it, please get in touch for a price  – traceydoxey@hotmail.com

Here again, is the link to the pattern, for the first 24 hours of sales, I will donate £1 per sale of each pattern to the RSPCA in Sheffield – because that is where Alfie was rescued before I adopted him, and they are a wonderful animal rescue centre.   Ravelry also take 10% and so do Paypal.   https://www.ravelry.com/patterns/library/chunky-knit-vest

Here is the RSPCA in Sheffield where I will donate £1 from the sale of each pattern for the next 24 hours.  https://www.rspcasheffield.org

Happy stash busting, Happy knitting.   Xxx