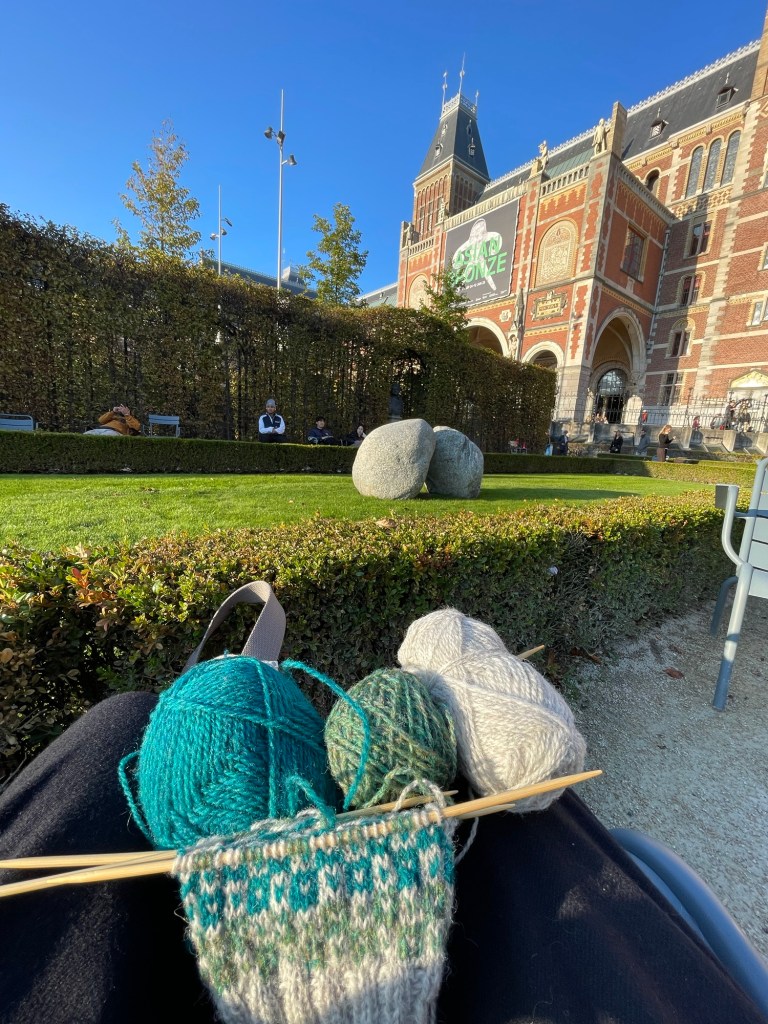
After visiting Amsterdam, I have made a new little knitting pattern, which I started knitting and designing in the garden of the Rijksmuseaum and finished on the Eurostar back to London. Then I had to do the difficulty of writing the pattern out, getting it checked and test knitted.
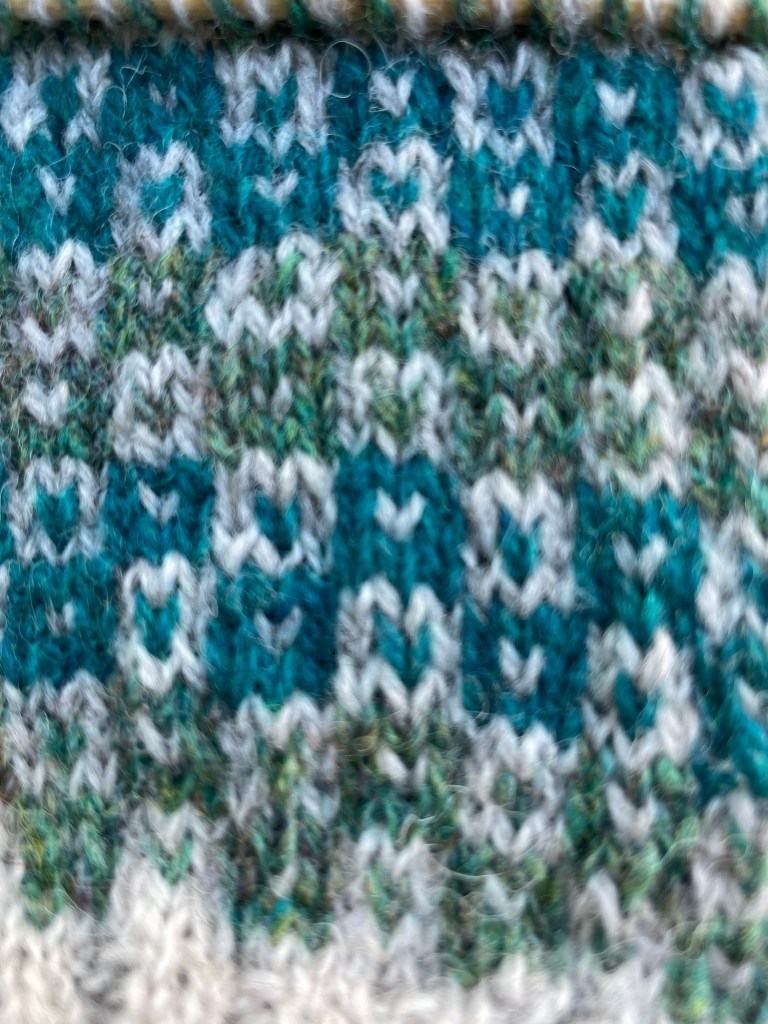
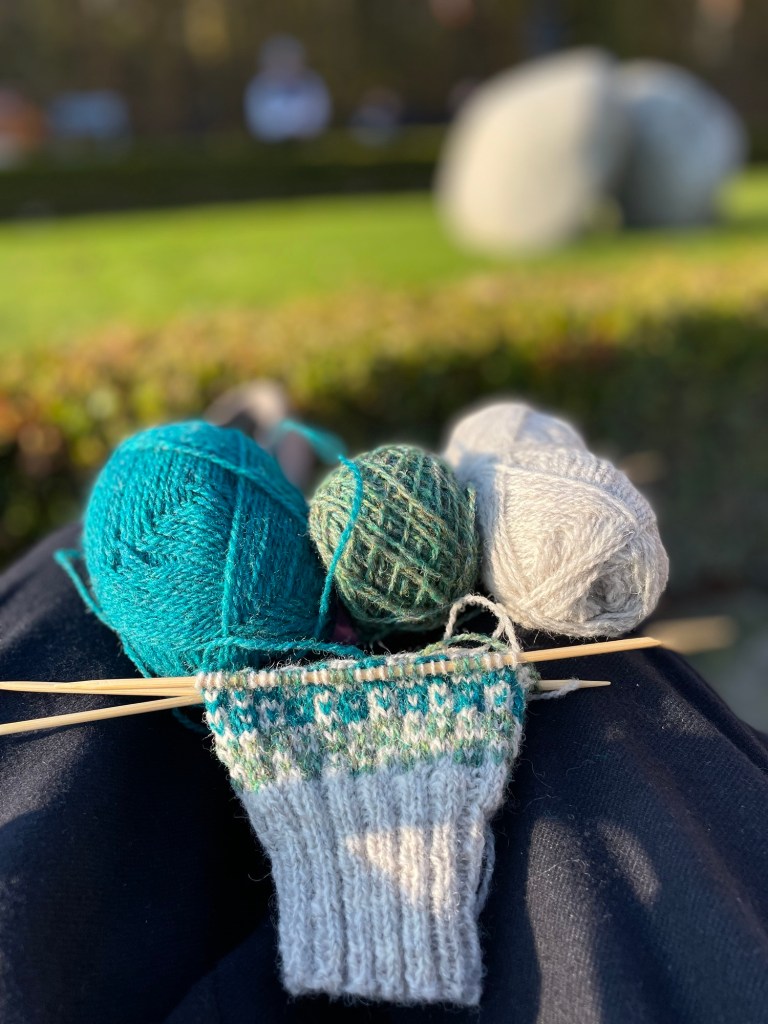
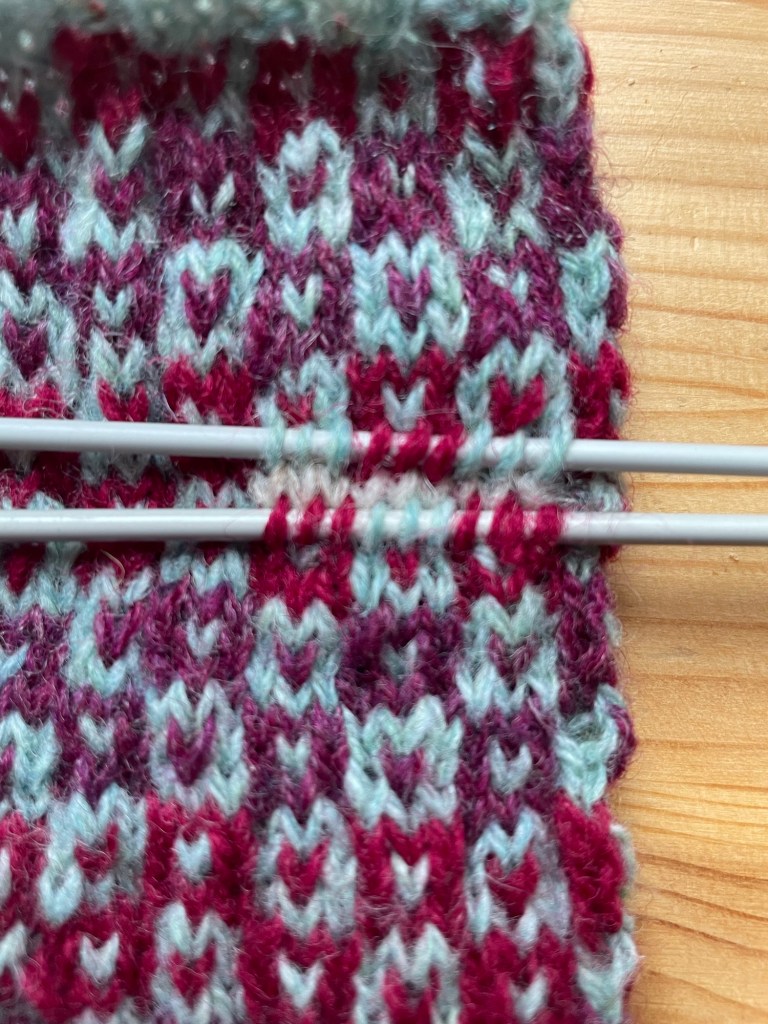
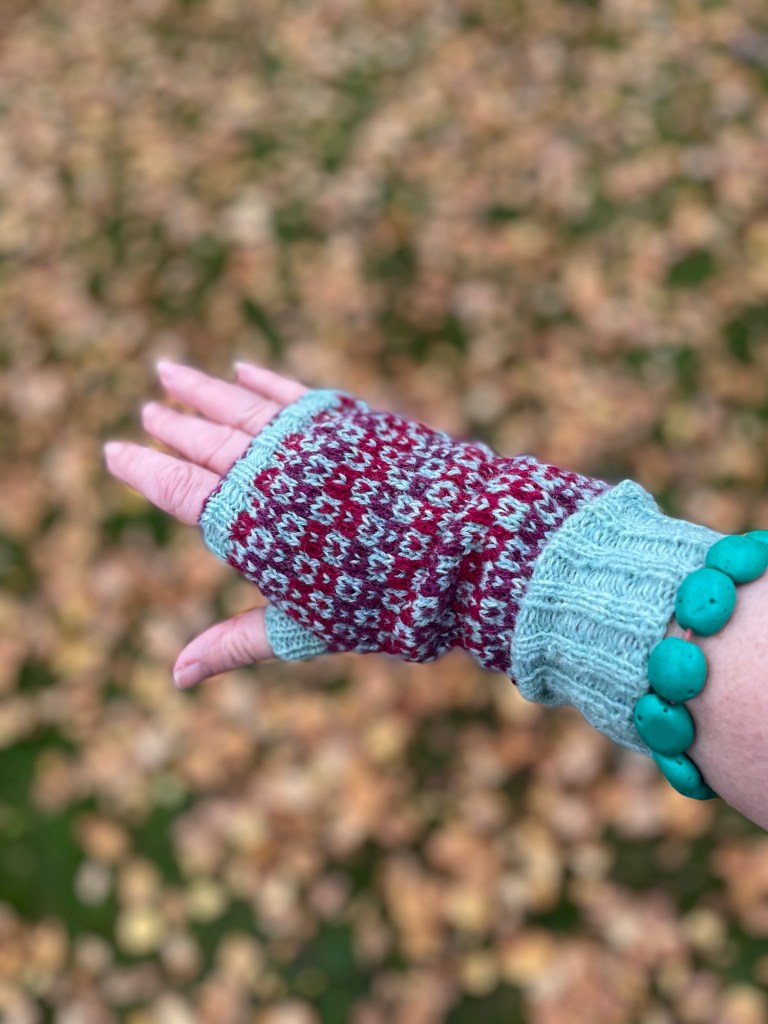
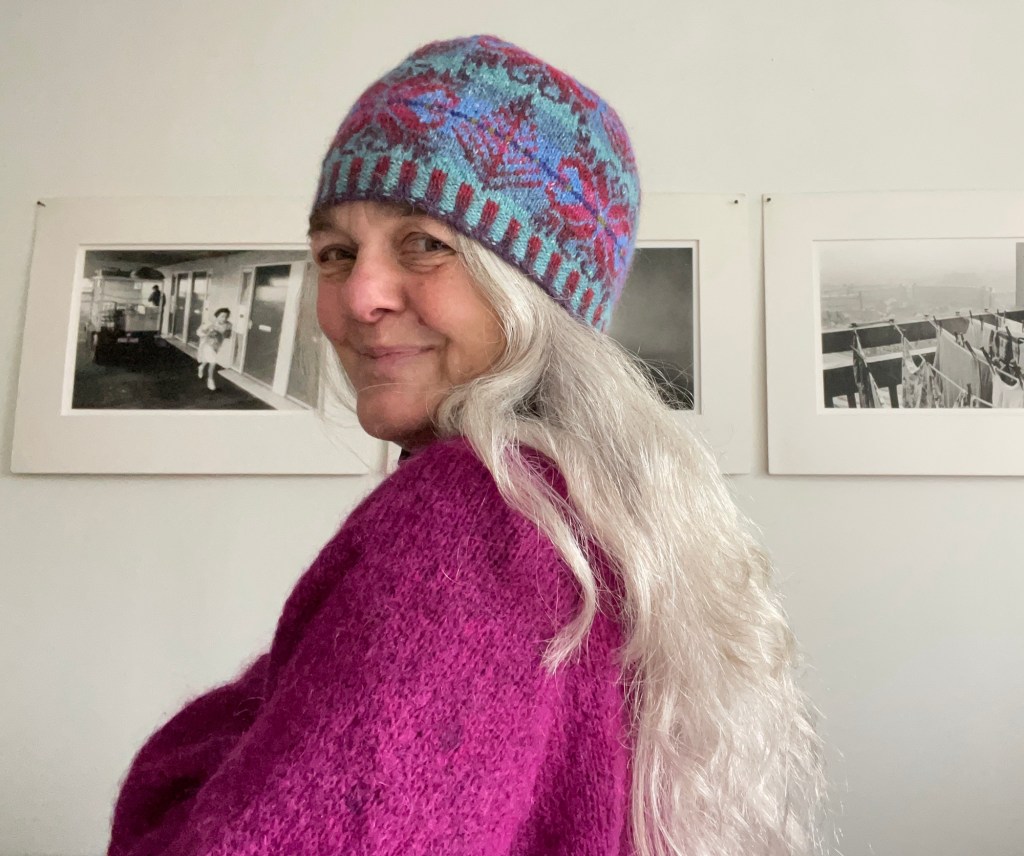
But, here it is, I’ve made a new Little Kisses Mitts pattern – the left mitt was knitted using greens inspired by the the garden against the pebble colour of Lee Ufan’s stones in the summer garden exhibition in the Rijksmuseum, in Amsterdam. Then knitted a matching mitt to the green one but using berry colours – Cherry and Raspberry. This pattern is a very easy knit using a cute peerie Shetland motif, which looks like little hearts in boxes – which is how I finally came to choose its name – Little Kisses Mitts.
The motif is very easy. It is only made up of 6 stitches and 6 rows, so, when you have set up the first round, you will not have to look at the chart again until the round to insert your thumbs.
The thumb is easy to knit. I have added clear written instruction and photo tutorial to take you through all the stages to produce neat little thumbs in your mitts. There is also a little reel on Instagram which shows all the stages too – it is here. https://www.instagram.com/reel/DBtwzO4IUen/ go to the link to see the clip of knitting the thumb.
Little Kisses Mitts, Pattern uses 3 listed 4ply colours from Jamiesons of Shetland but you can knit it in 2 colours or as many colours as you would like to use from your stash. It’s a very quick and joyful knit with endless colour possibilities. I knitted the both mitts in Jamieson’s of Shetland, Spindrift. In Pebble, Moorgrass and Mermaid – then in Berry colours using Dewdrop, Cherry and Raspberry.
You can also use JC Rennie Scottish Supersoft Lambswool 4ply which I also used after buying a lovely large ball of aqua colour in Amsterdam.
I have used 3 colours in each of my knitted examples, in order to make the knit reasonably priced – rather than the patterns that I have been knitting recently, which have grown in the amount of colours used in them.
As always, thanks to Karen Barker for her brilliant checking of all of my details written in my pattern and to Gary Butler for knitting the mitt and giving advice on the pattern notes. Your support is much appreciated
I would love to know what you think of using this tiny little motif in this easy pattern.
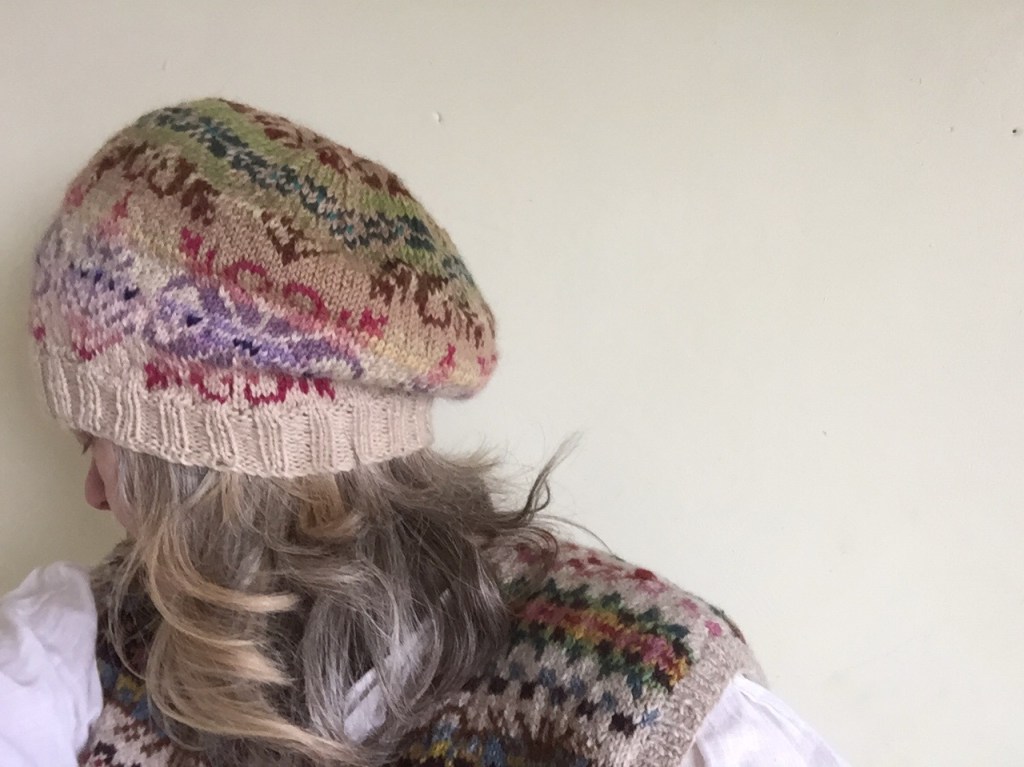
This week, I finished my 2nd Fair Isle Pullover worksheet to make a vest for my sister. The finished vest, has been made for and about my sister, in that she chose the colours and she did not want arms. These decisions, as well as others, set the vest apart from my jumper, which uses 100 colours. I am now interested in exhibiting the two knits, side by side, as a piece called – I cannot Reach You.
Below are some of the instructions in the worksheet, which is easy to adapt into your own signature story in knitting.
Included in this worksheet, are 2, A4 sized complete, full colour charts used in my pullover / vest. Chart 1, is my full body chart and the sleeve is chart 2. All of the, (more than) 90 colours that I used in this jumper are listed. I am giving you the tools to make your own road map for your own vest or pullover, or scarf, or hat.
You can incorporate any of these 11 large Fair Isle OXO motifs and 12 peerie motifs into any of your own projects and use any colours that you have or even just use 2 colours.
The 190 row pattern charts, knitted in multiples of 24 stitch repeats, included in this work sheet, is not a jumper pattern, nor a vest pattern. What I have produced is a worksheet including the entire range of Fair Isle OXO motif bands that I have knitted. I have built them into 2 large full charts with a clear centre stitch line marked so that you too, can either replicate my jumper entirely, or move the patterns and colours around to your own taste. One sleeve of my project is knitted in traditional OXO Fair Isle patterns – the other is knitted using Aran twisting, following how I sometimes braid in my hair in French plaits. I have been asked many times, why I knitted an aran sleeve – why not? and people often have their opions on this sleeve, which is fine, but it is my knit and anyone can knit however they choose to – You don’t have to stick to EVERY rule. I have not included the Aran sleeve charts in this worksheet but the neck aran pattern is included.
The motifs and colours within this worksheet, are a treasure trove of endless possibilities for you to be creative and make your own vest or pullover by incorporating them into your own favourite vest or jumper pattern. Use any colours that you have, use any wool that you have, use 2 colours, or like me, use over 90 colours in your jumper. In the vest I used 9 colours. I am giving you a recipe for you to enjoy and work with in whatever way you want. I am giving you the tools and the freedom to make your own design. This is more than a pattern bank, I lay out how the patterns are aligned. I also explain the importance of a centre alignment.
Recently, I have been reminded of how Kaffe Fassett, in the 80’s made beautiful patterns in books and wrote, ‘ choose 9 balls of varied light colours and 9 balls of dark colours’ and people ran with that, me included. Sometimes, he would write – use double knitting yarn, sometimes he listed the yarn and the exact colours. This worksheet is similar. It gives you all of the tools to knit your own beautiful projects and to be free with your own decisions. It gives you the chance to grow in your own understanding of your knitted projects.
I would love to see them on Instagram. My jumper is knitted in Jamieson’s of Shetland spindrift using – some small lengths, some longer. These colours I have had left over from previous projects or workshops or designs. I just worked them together and alongside each other. I did swatch some colours to check how they worked, and I do recommend that you do that too. As my colour choices are not often repeated in this project, not great lengths of yarn for each motif are required. But you can knit your own project differently.
Use your stash or buy just 4 colours or even 2. The choices and permutations are endless but this relies on you. It relies on being excited to try this idea and to develop your ideas. The project requires you to use your own favourite jumper or vest pattern and figure out the centre front (which in my case, mirrored my centre back) and I knitted multiples of 24 stitch pattern to fit my size. Make sure that your motif bands align with the centre front. I have made this easy for you by outlining the centre front line. Developing your sense of colour is achieved by enjoying colour, swatching to experiment for colour combinations.
It took me nearly one year to design and make this jumper – it took me 3 full days to map out all of pattern repeats in the motif bands and to chart every stitch used in the body and in the sleeve of my own knitting project that so many people wanted a pattern for. It has taken 2 more days to pull it together here. It took me a lot less time to knit the vest.
I knitted my jumper and the vest, in the round up until the arm holes, then I split it and worked on the front and back separately but at the same time so that I used the same colours. Make sure that the centre front stitch is the right one so that the motifs bands align above each other. In the chart, stitch 12 (out of the 24) is the centre stitch of the first large OXO motif. The charts are in multiples of 24 stitches.
The worksheet is a roadmap for you to experiment and live freely within your own colour / motif / pattern choices. I would love to see any projects that have been knitted using the worksheet which is here
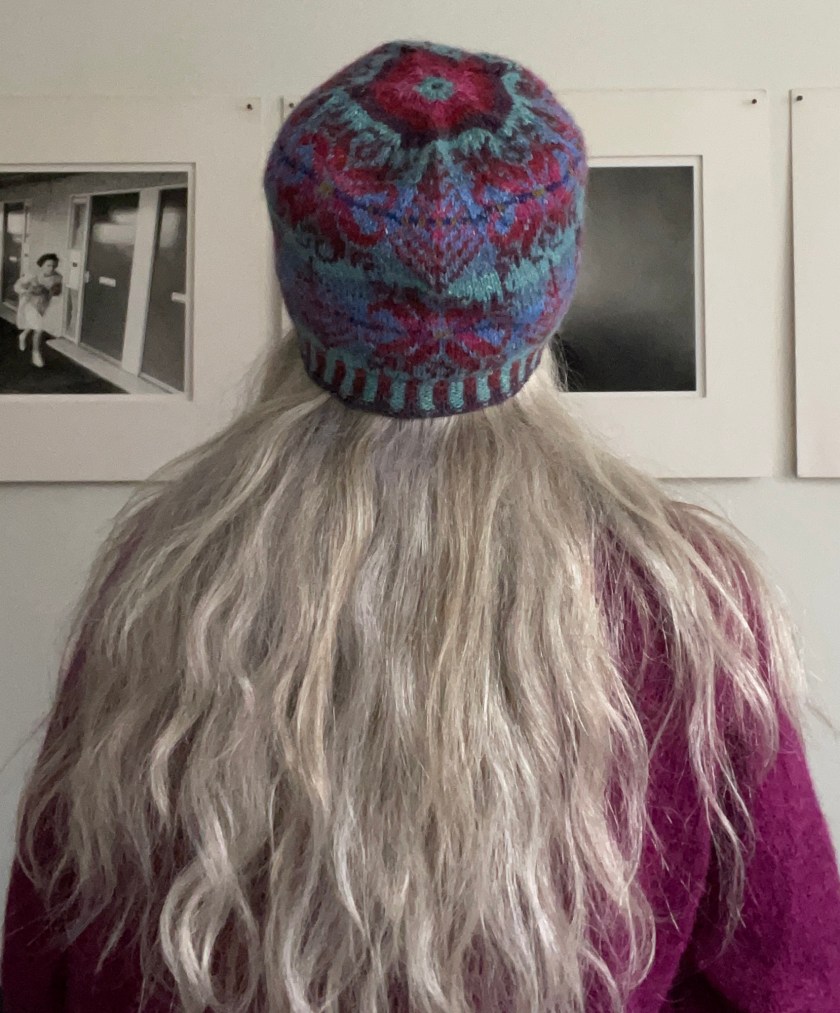
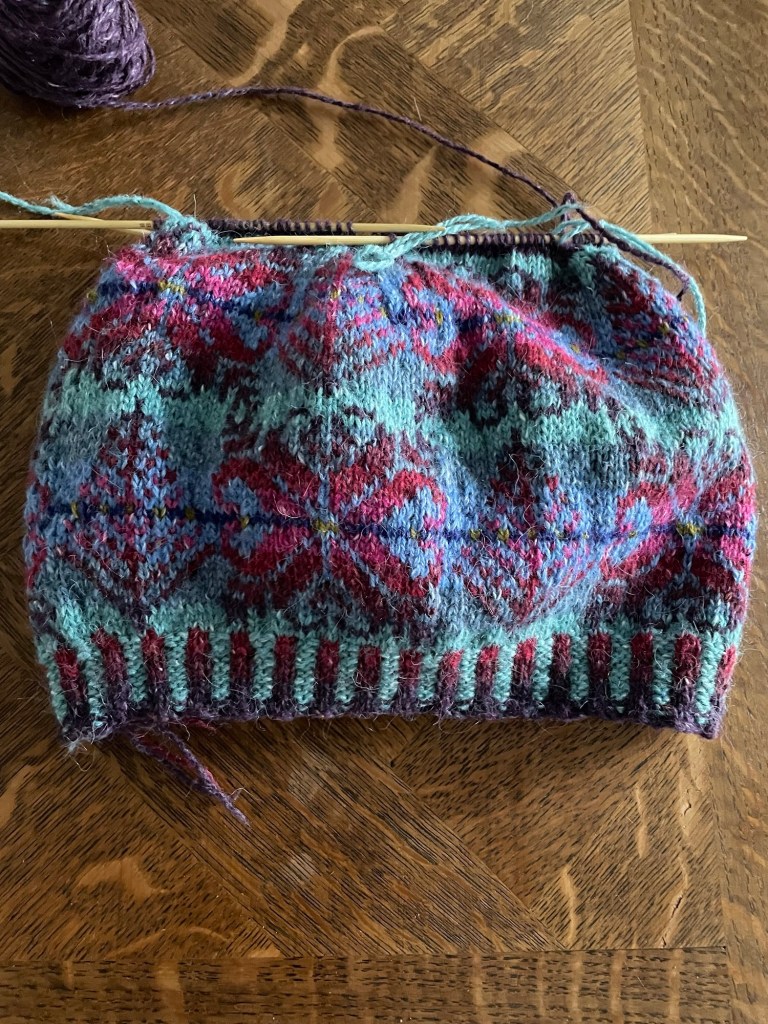
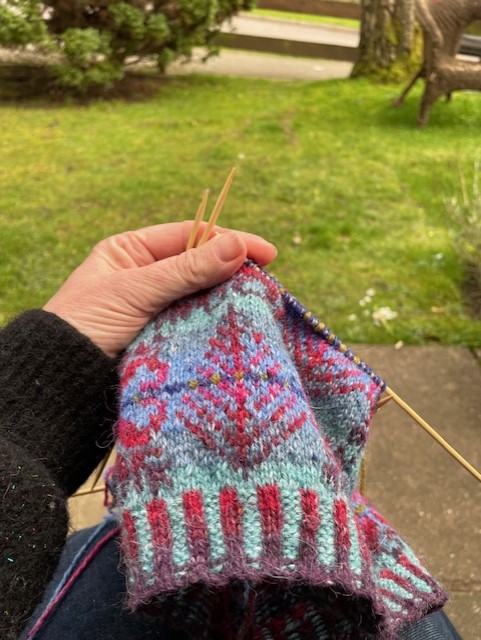
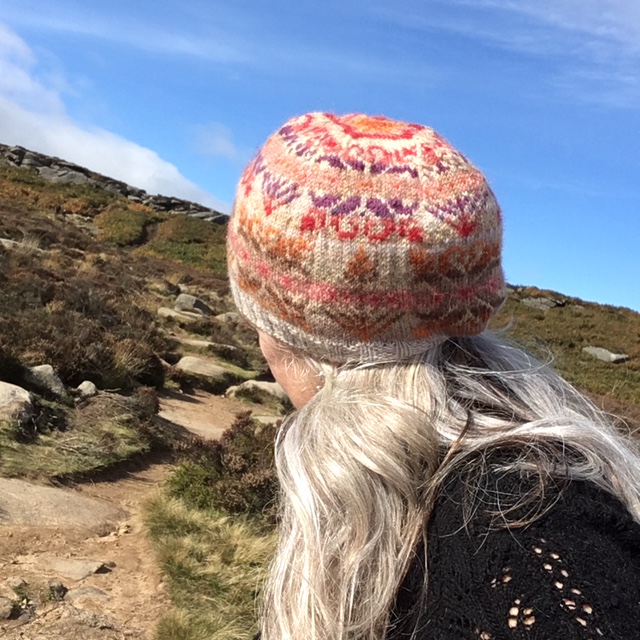
In preparation for the workshop, I have been working with Kerry, from Rowan, regarding yarn colours to work with in in the workshop and to reknit the Sea Urchin hat pattern using Rowan Felted Tweed.
It didn’t take me long to finish the new hat and I was really pleased with how the colours worked together. Along the way, I had to adjust the pattern for an entirely different yarn to the one I originally used. I knitted a corrugated rib for this pattern to show off the texture.
RFT, is thicker yarn than I originally used – it’s composition is 50% Wool, 25% Alpaca, 25% Viscose and comes in 50g balls. It knits up as double knit, it’s soft and not scratchy. Jamieson’s Spindrift is 100% Shetland wool and knits up as 4ply and can be scratchy. As well as the feel and size, the two hats turn out very differently in shape. The Rowan Felted Tweed hat is, of course, bigger thant he original.
When I first knitted the Sea Urchin hat pattern ten years ago, I used vintage tapestry yarns and the hat was just a quick project for me. I knitted it in a number of different colour ways before going to Shetland for the first time in 2015, and finding Jamieson’s spindrift. I still have those first hats from 2014 – they’ve been part of my design process going back 10 years. The new hat, knitted in RFT is of similar design to my first ones. Below are images of the ones I made in Tapestry yarn.
The yarn used in any project dictates the size and shape of the finished hat. Over time, I’ve blocked each hat in to a shape that resembled a slouching hat or a kind of beret and latterly, with Jamieson’s yarn, it was a neat beanie.
Seeing the early photos of this hat, I see a different shape entirely to the one that they morphed into over time, taking on the shape of my head through being soaked in gale force rains, being stuffed in pockets and in bags and left for months in a drawer. When I was living in Brindister, West Burrafirth, Shetland, I wore the Tapestry yarn hat every day whilst walking around the voe on those winter days- especially in the piercing winds.
It was then that I was first inspired by the Sea urchin shells that I found in West Burrafirth, where I began to find many discarded Sea Urchin shells of various sizes and colours, left by seagulls. They were abandoned on banks and on flat, wet, mossy plateaus used as seagull breakfast tables. All had been smashed to get to their breakfast but I was on the lookout for a complete one. My very first complete found sea urchin shell was an exciting surprise, like finding a four-leafed clover when I was a kid. I turned it around and around looking at its pattern. I collected any shell that was whole, even if it was broken into until I couldn’t hold them in my hands – so I used my hat to carry the porcelain like sea urchin shells back to the croft house. When I scrutinized the patterns, I saw that both my hat and urchin shell had a similar shape – the hat with a 5-pointed section crown and an urchin-like roundness and in return, the sea urchin shell looked hat-like. When I returned home to Yorkshire at the end of 2019, I produced my first knitting pattern in January 2020, and called the it, Sea Urchin Shetland Hat pattern.
I am now loving using Rowan Felted Tweed yarn for this new pattern which is just called, Sea Urchin Hat.
My workshop is now live on the Rowan Connect Website. There’s lots of workshops on during the weekend of 12th – 14th April – Even Kaffe Fassett, is doing a talk. So, maybe I will see you online on at my session on 12th April – hope so. AND if you would like to win a place on all complimentary sessions and to my workshop at Rowan Connect on the weekend of 12th – 14th April, I will be picking one person out of a hat from the people who buy the new pattern. Closing date to buy the pattern is April 5th.
I’m really excited to be doing an online colour blending workshop for Rowan Connect because it will run completely differently to how I run my smaller workshops.
Online colour blending workshop for Rowan Connect in April is in link below